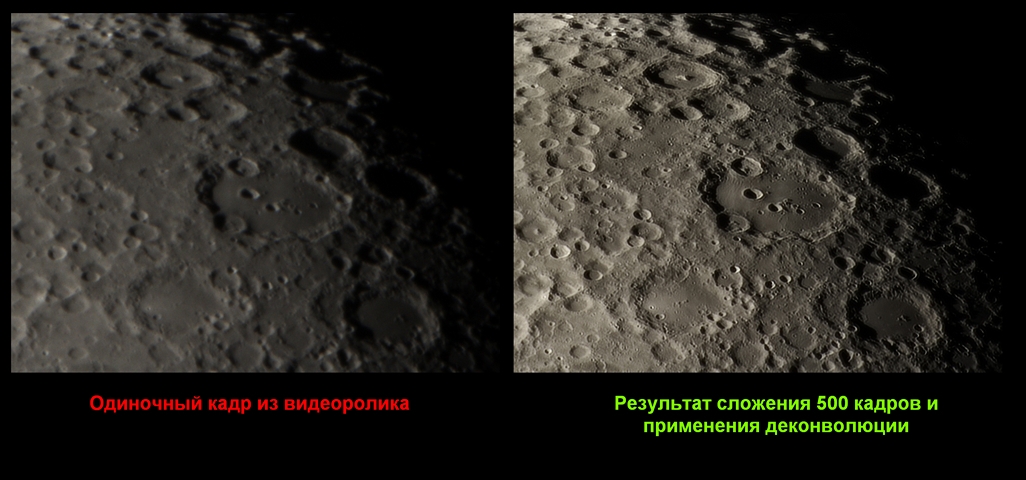
In this article I will talk about the nuances of shooting and processing the processing of the movies of the Moon. Described below is also relevant for shooting fragments of the Sun (for example, sunspots). Probably, you are already familiar with my manual for shooting and processing planets. If not, I strongly advise you to read it for a better understanding of this article.
The principle of obtaining a clear picture of the Moon or the Sun from a video is simple and consists of the following points:
1. Capturing
2. Selection and stacking of images
3. Application of deconvolution or wavelets to the result of stacking.
Let’s look at all these points in more detail.
1. Shooting. When shooting planets, the image can move around the frame and even go beyond it. Alas, with the Moon, this trick passes only when capturing the entire disk. For successful capturing of separate fragments of the Moon’s surface, a motorized mount is necessary. The more accurate the reference, the better the large area of the frame will be involved in the addition of the material. Of course, the telescope must be thermally stabilized and adjusted (collimated).
When using the equatorial mount, the duration of the rollers is not limited. Only with very long videos can change the length of the shadows of craters – then you can make an animation of this phenomenon. However, azimuthal motorized mounts (for example, Celestron NexStar) have the effect of rotating the field when the image slowly rotates around the central area of the frame. I recommend azimuth mount owners to limit the shooting duration to a few minutes or install a mount on an equatorial wedge.
The scale of the image can be very different – from shooting a whole disk to shooting individual craters, so I recommend to get a good Barlow lens.
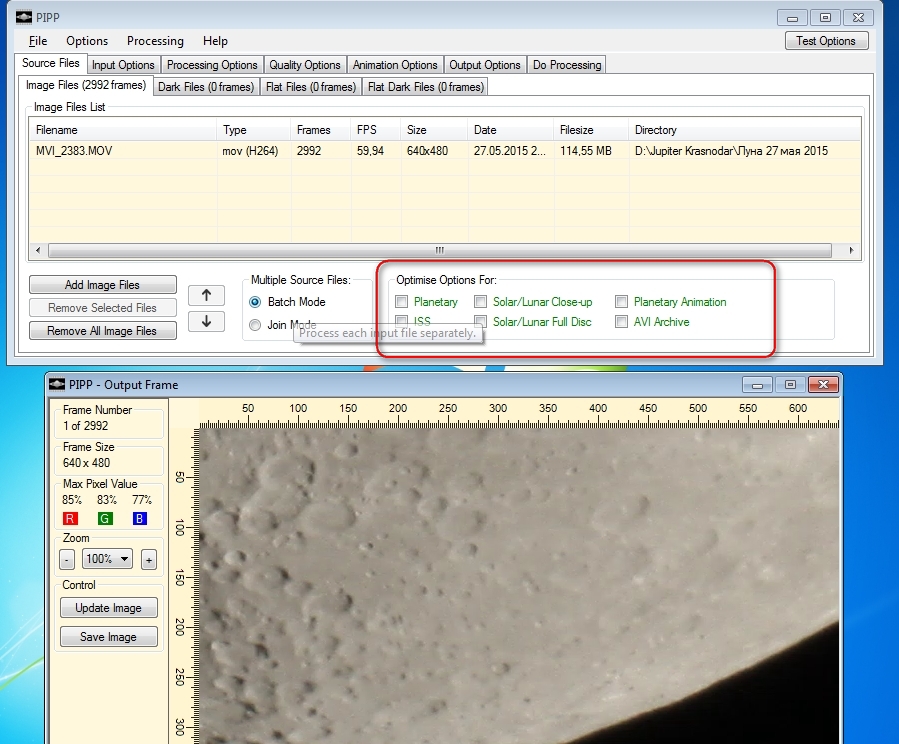
2. Selection and addition of personnel. First of all, you need to convert the video to a format that is understandable to the program Autostakkert. If the camera writes in SER format or in uncompressed AVI format, then the video can be immediately opened in Autostakkert. Otherwise, drag the video of the Moon into the PIPP program window, do NOT START the tick marks in the indicated places, go to the DO PROCESSING tab, press START PROCESSING and wait. After trimming, the program will open a folder with a cropped clip that you can feed to the Autostakkert.
My ZWO 120 MC camera writes directly to the SER format, which does not need to be converted, so I will show further actions with its example
Launch Autostakkert.
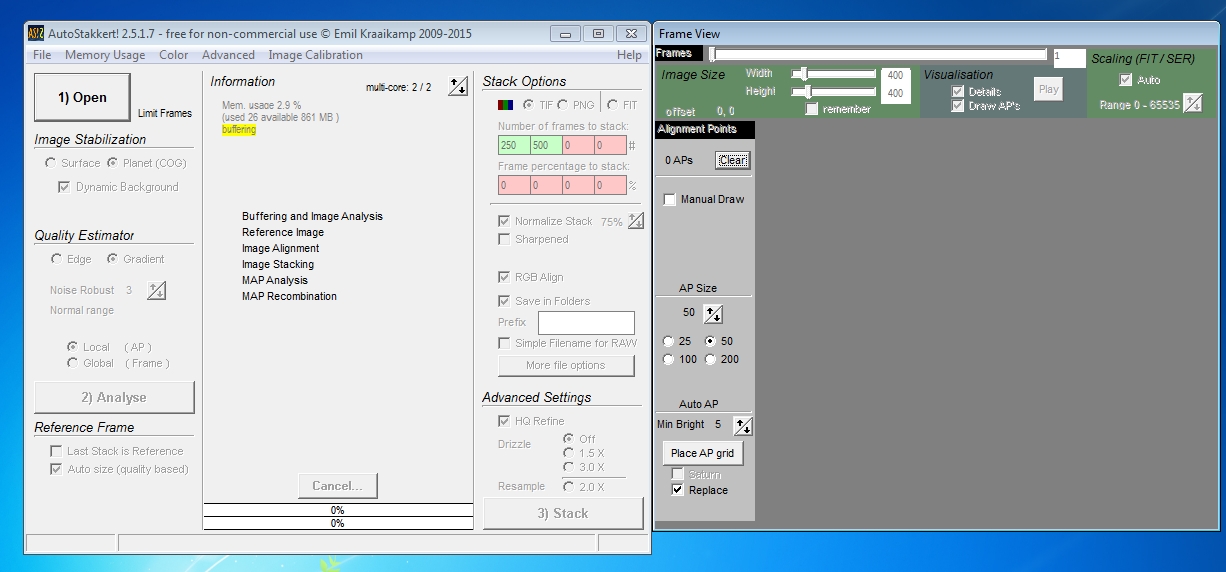
Click the button 1) OPEN, find our video, open:

If the movie is opened correctly, then we see such a window. In it we are interested in the following ticks – SURFACE (this type is used when shooting fragments of the Moon and the Sun). If the image shifts noticeably, it is better to set the IMPROVED TRACKING checkbox, for a stable image, we do not check the box. In the lower part, select EXPAND – this is an extension of the frame area, or CROP – cropping of parts of the image that are missing in some frames. For example, if you are shooting with a camera with a resolution of 1280×960 and the image is slightly shifted when shooting, with the EXPAND checkbox selected, the resolution will be greater than the original (for example, 1340×1024).
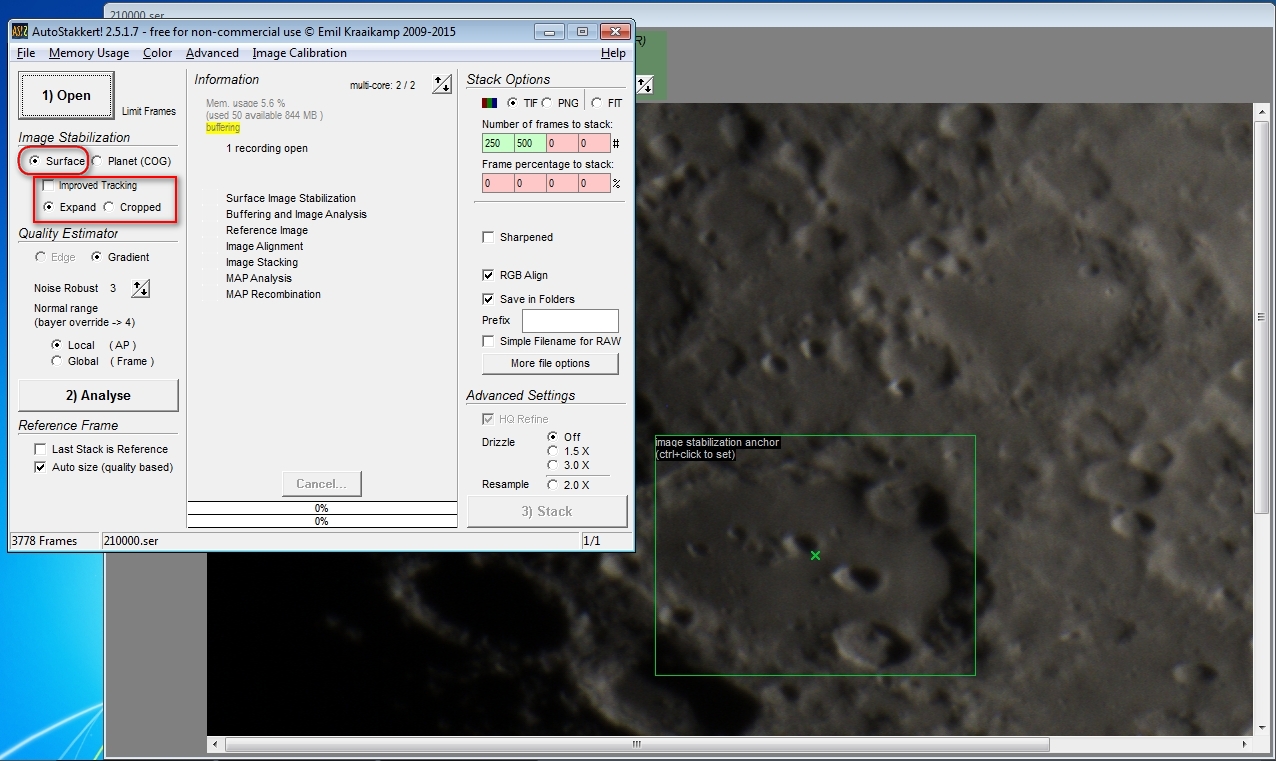
Next, we switch to the second window of the program, move the slider and look for some crater (or sunspot) near the center of the image, which is present on all frames. After that, hold down the CTRL button on the keyboard and click the left mouse button. We have established the so-called “stabilization anchor”.

Then we return to the first window of the Autostakkert program, press the 2) ANALYZE button and wait.

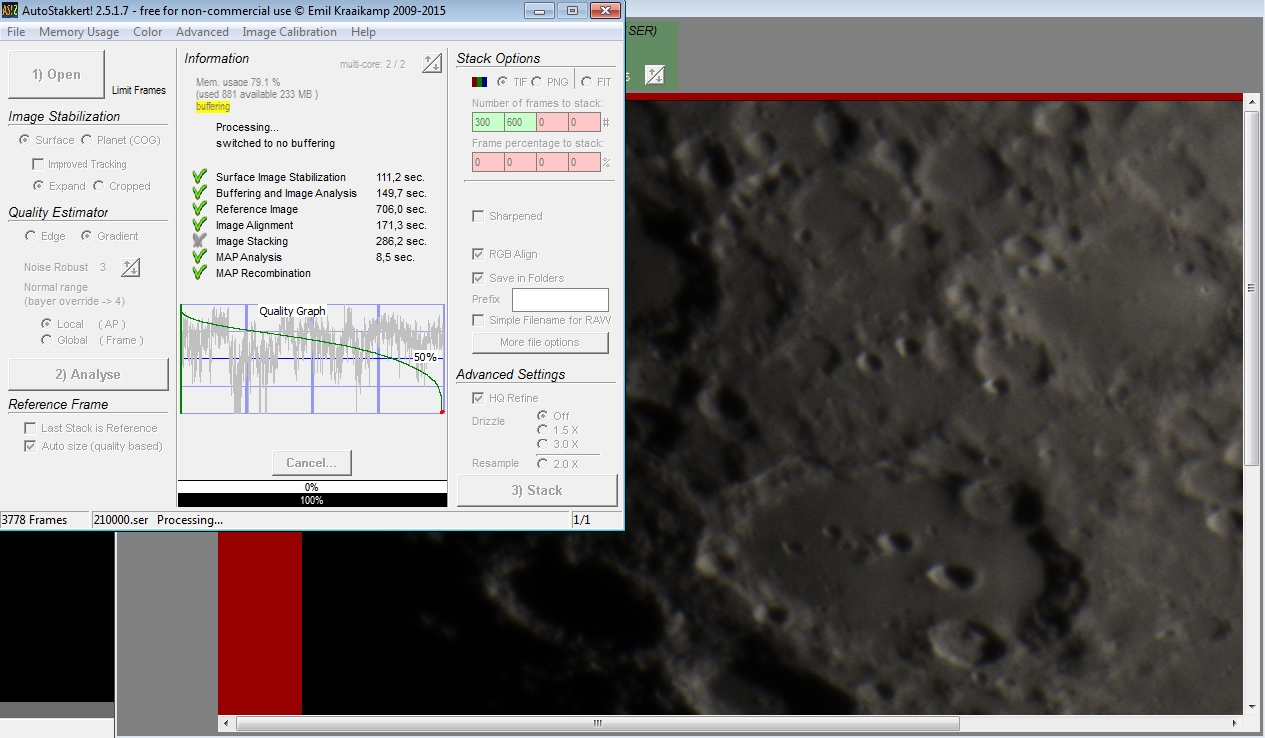
Then you must specify the number of frames (or percentage) for addition. I usually specify 20-30% of the total number of frames. The calmer the atmosphere, the more frames you can add. You can specify multiple values. I also advise you to tick the RGB ALIGN item – this is an automatic alignment of color channels (so that there is no “rainbow” on the edge of the planet).

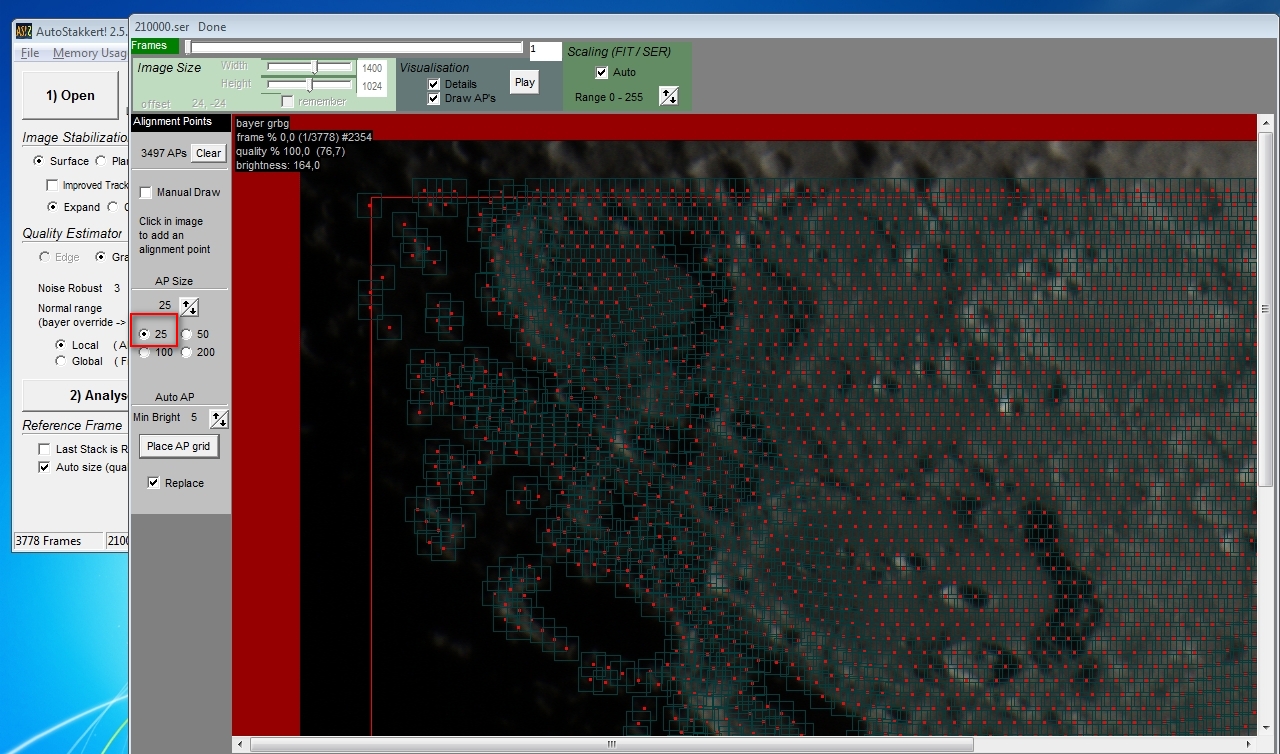
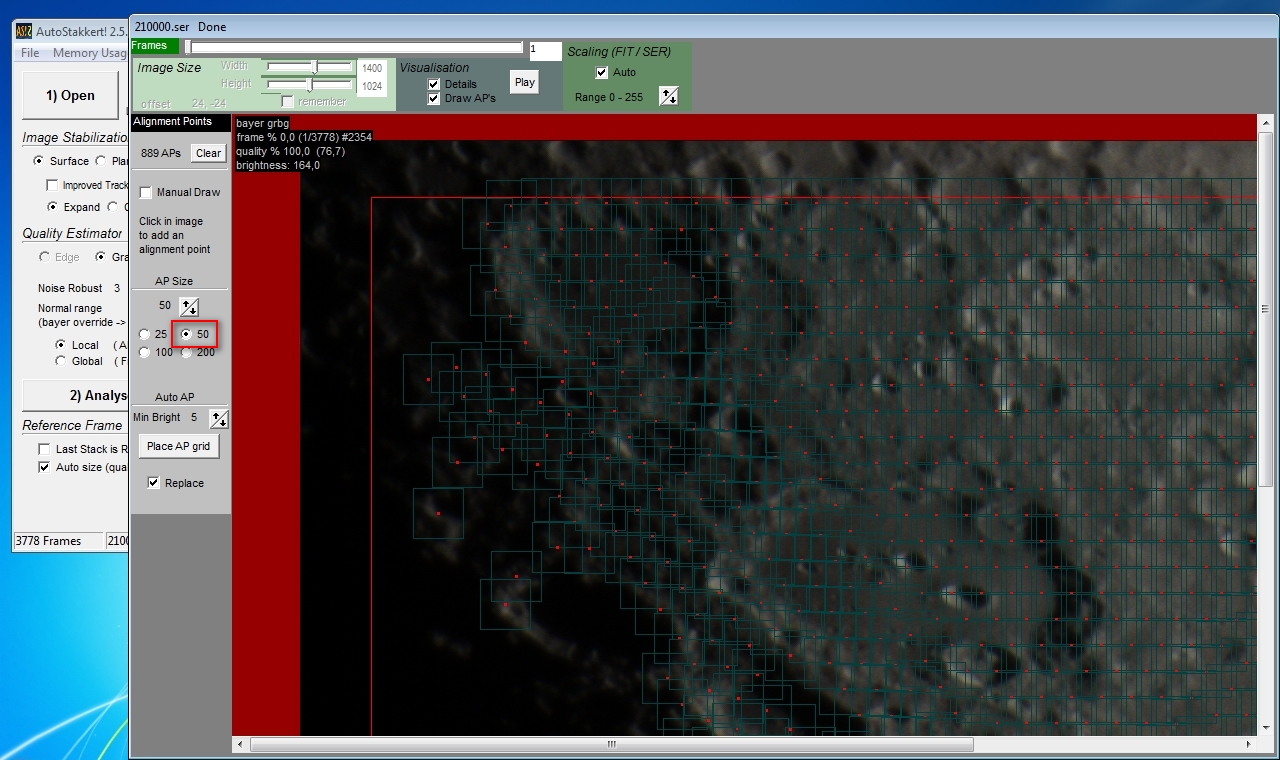
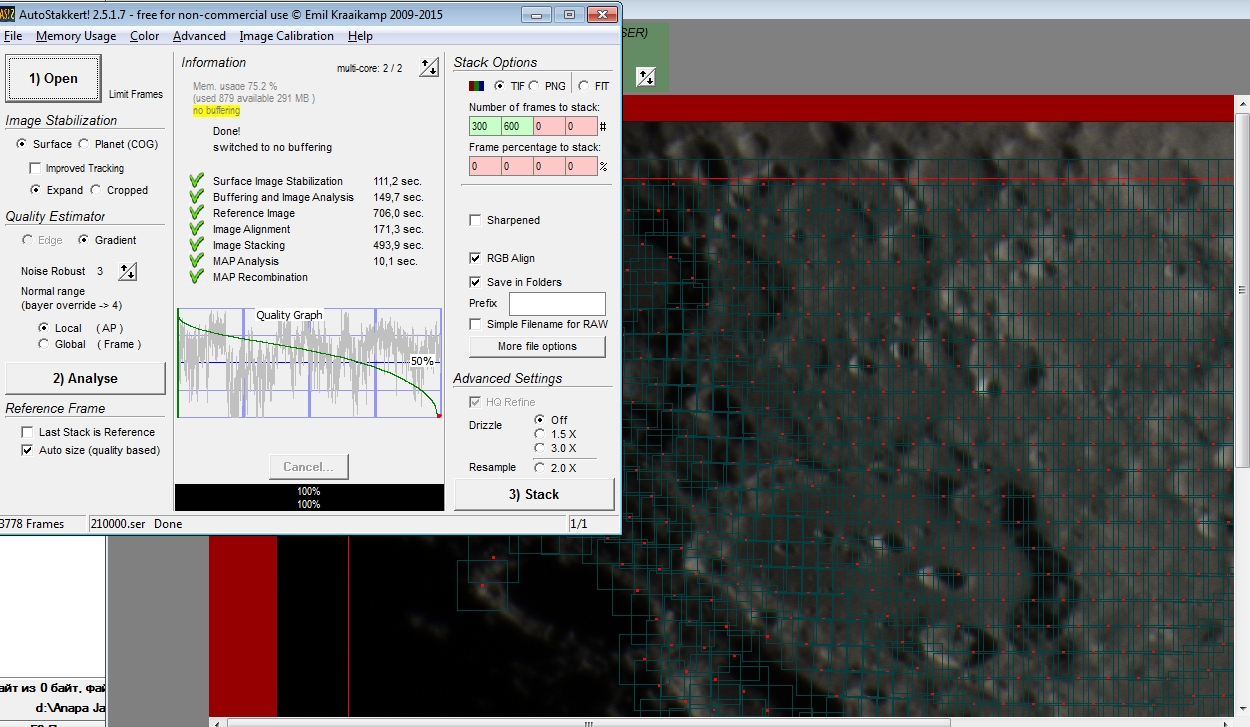
After setting the number of frames, switch to the second window. We look at the following program blocks – AP SIZE and AUTO AP. AP SIZE is the size of the alignment point, it must be several times larger than the size of the parts for which the program can “hook”. You can choose either ready-made values (25, 50, 100, 200), or set manually (button with two arrows). You can arrange points either manually (with the left mouse button), or using automatic placement – the AUTO AP item. When you click on the PLACE AP button, the GRID image is covered in squares – these are the alignment points.


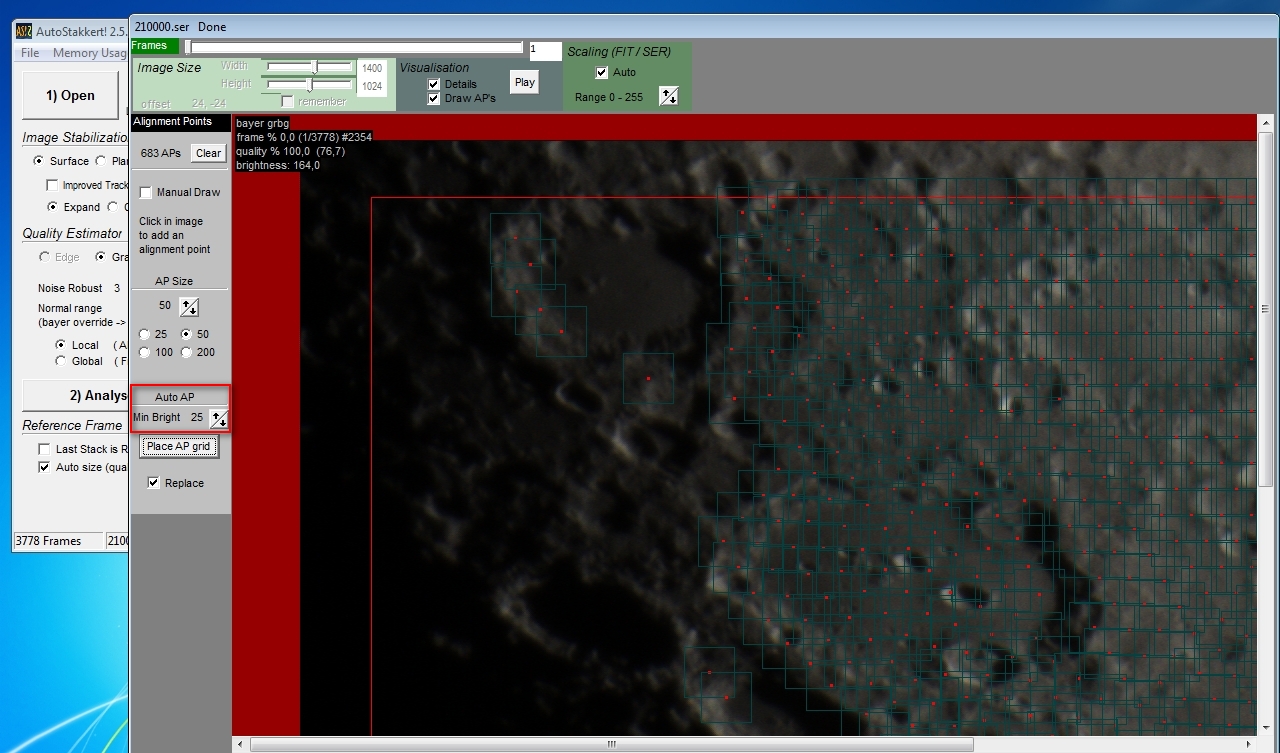
If some of the craters do not capture the auto-install, you can decrease the MIN BRIGHT value and press the PLACE AP GRID button again.
If everything ok, switch to the first window of the program and press the button 3) STACK.
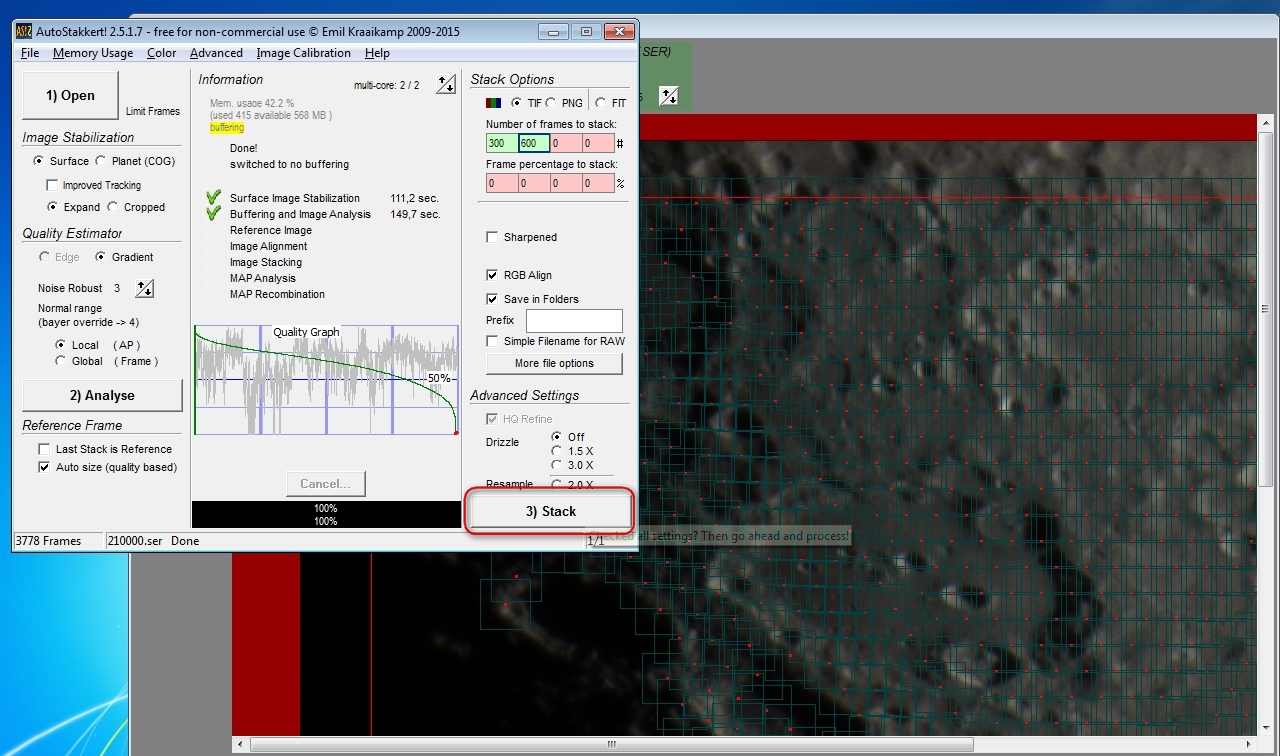
After all the checkboxes in the program window turn green, several folders with the result of addition will appear next to our video:
![]()
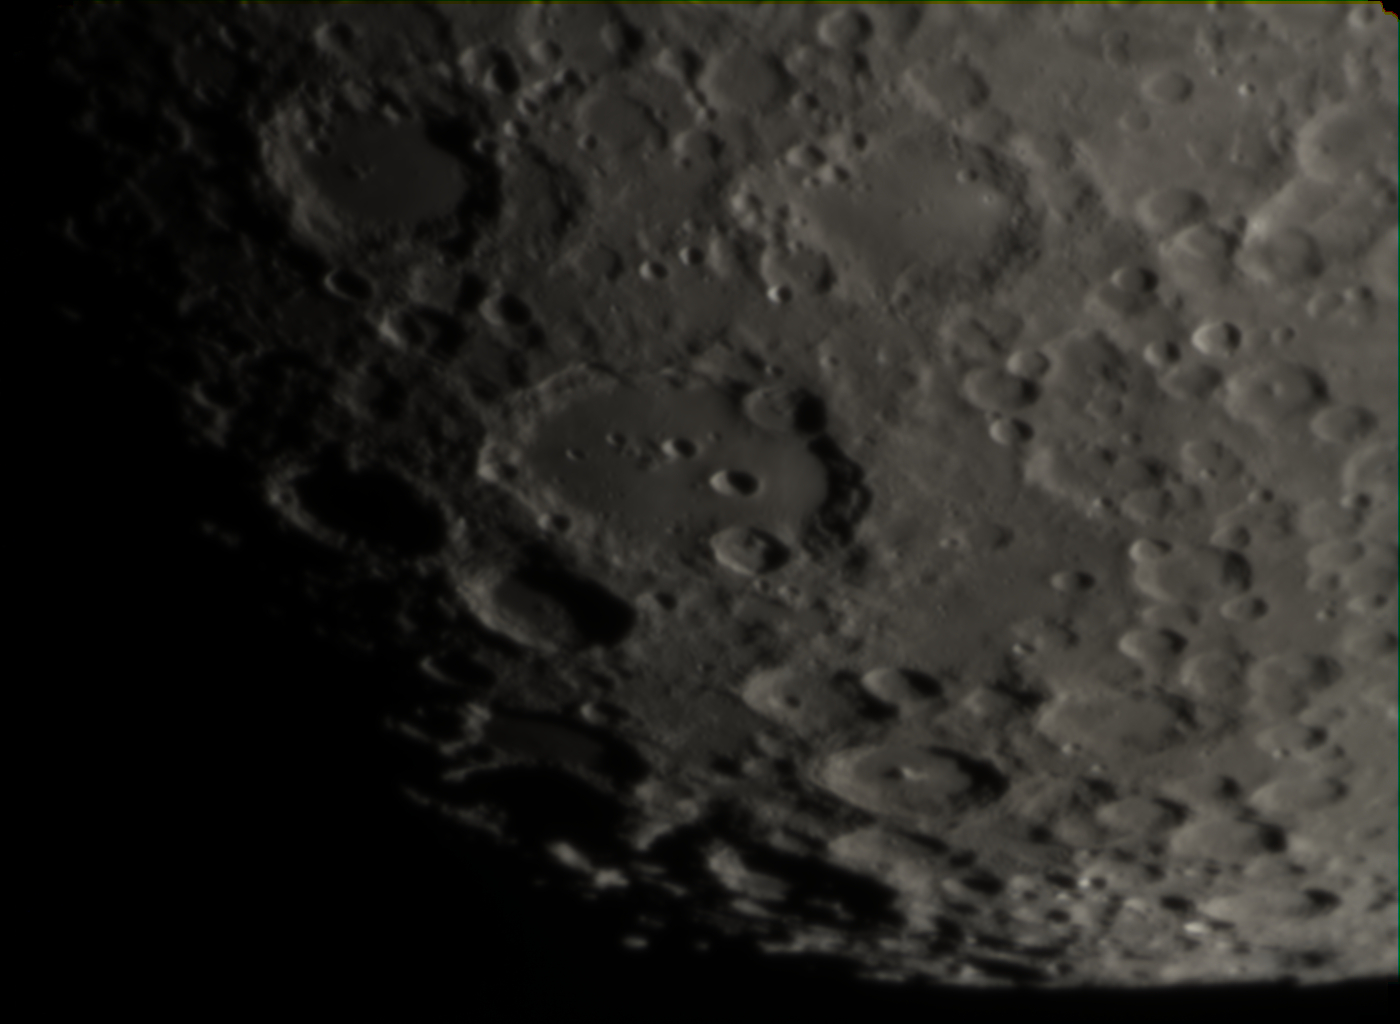
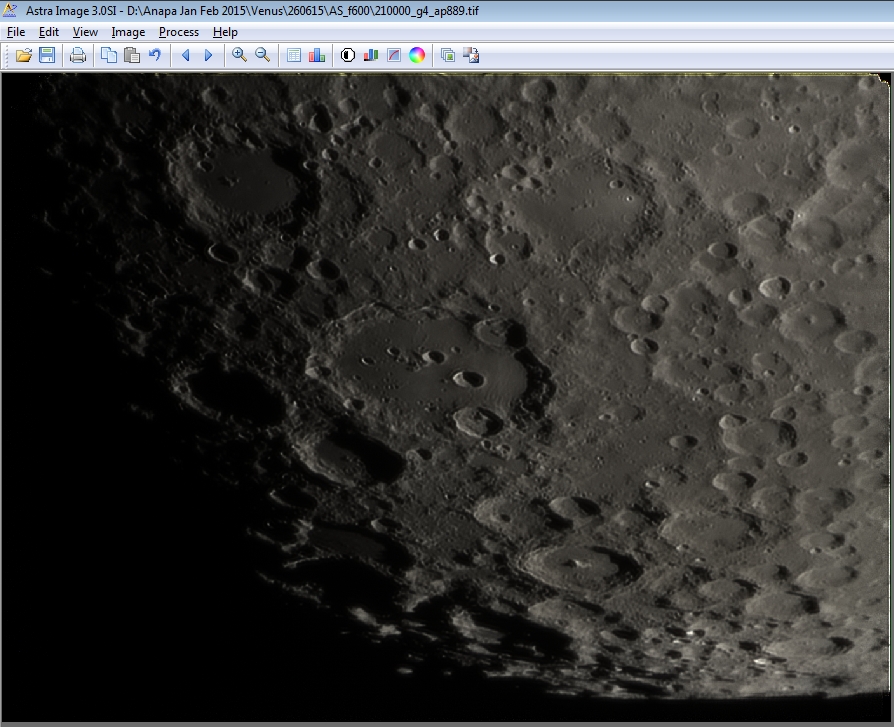
Go to the folder AS_f600, open the picture and see this blurry image. This is our result of the stacking – the so-called stack.
I downloaded the stacks for training separately, you can download them via the link. -> Stacks
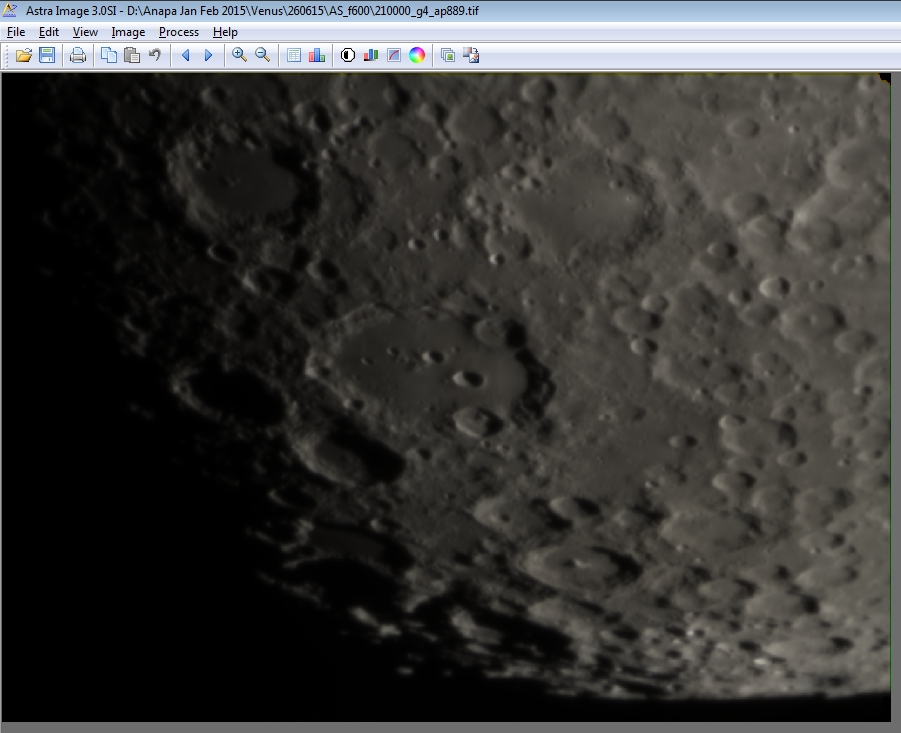
We do not pay attention to blurriness, but download the Astra Image program using the >link<.
Astra Image 3.0 SI is free. Install, activate, run. Open our “blurred” stack.

Now we have two options for sharpening. The first is wavelets, the second is deconvolution.
Wavelets: go to the tab PROCESS> WAVELET SHARPEN

See 5 sliders. The upper slider sharpens the smallest details, the lower – the largest. However, the top sliders add more noise.
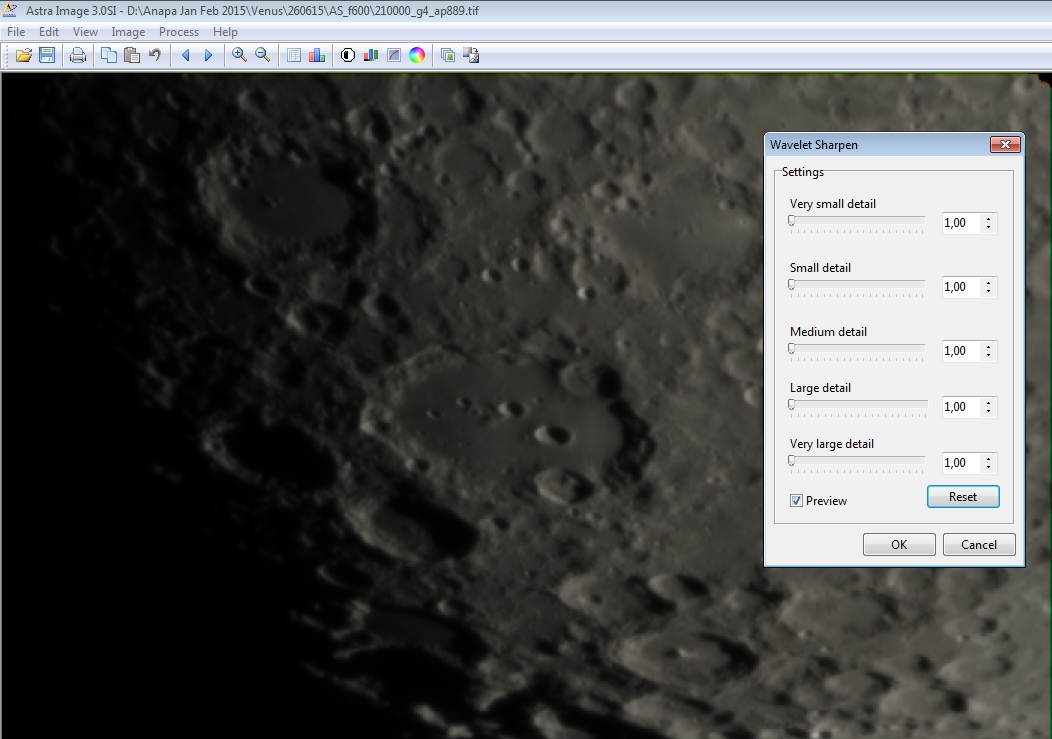


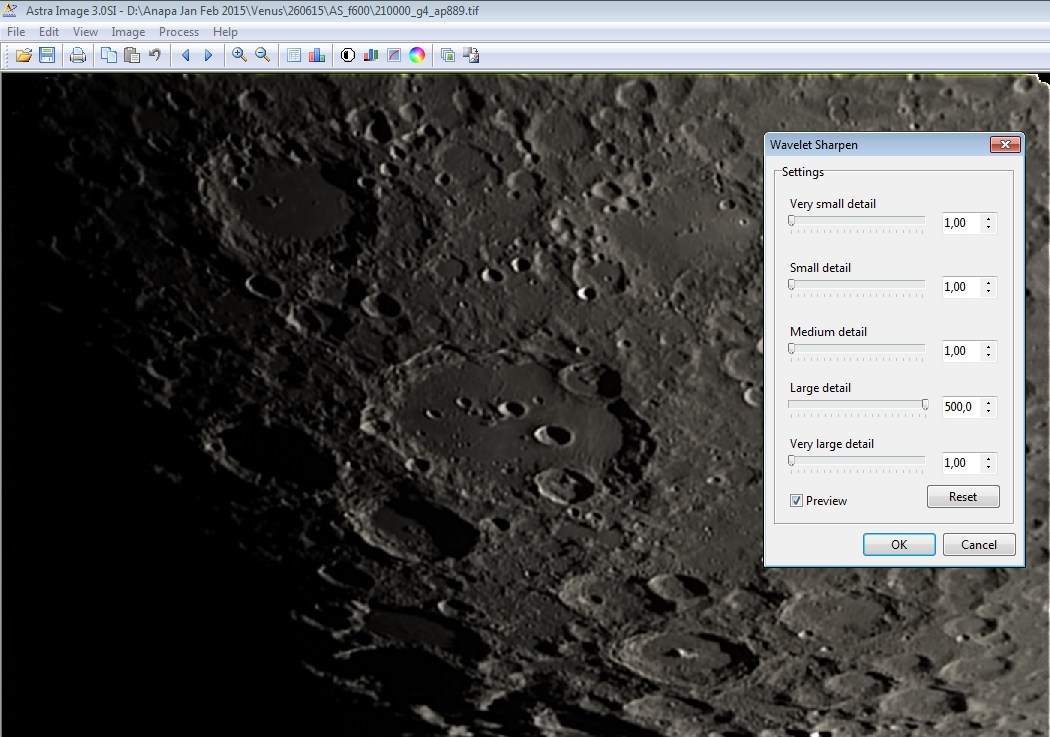

Let us consider the following combination of sliders:
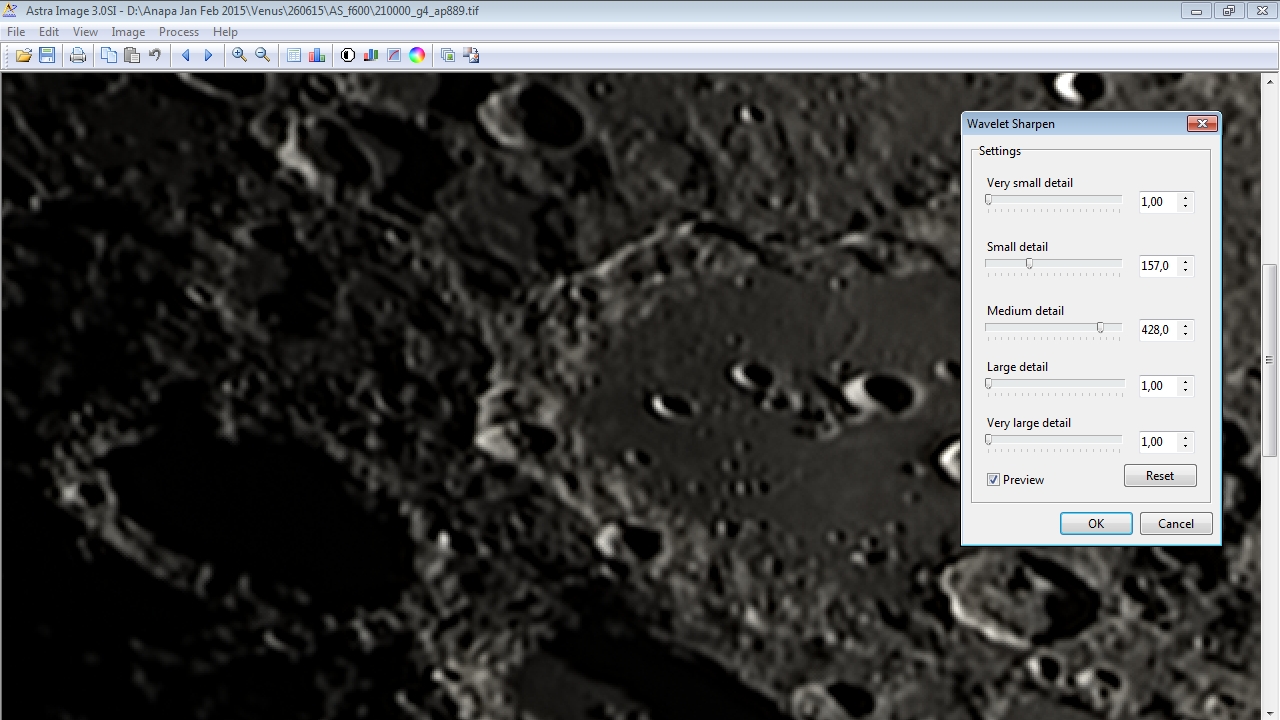
If satisfied, then click OK
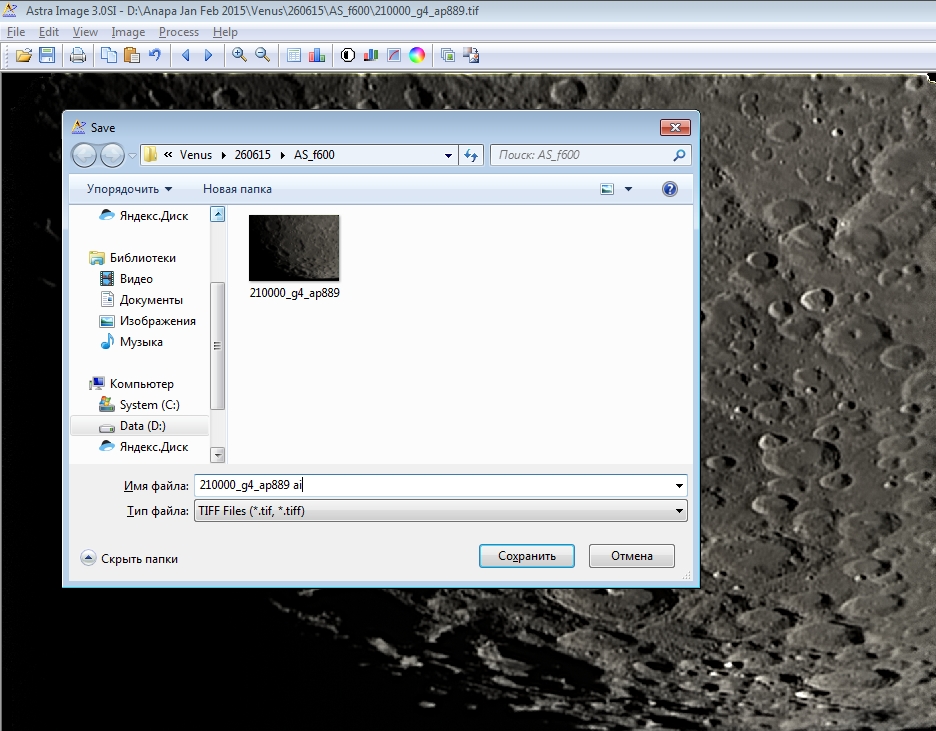
Save under a different name:
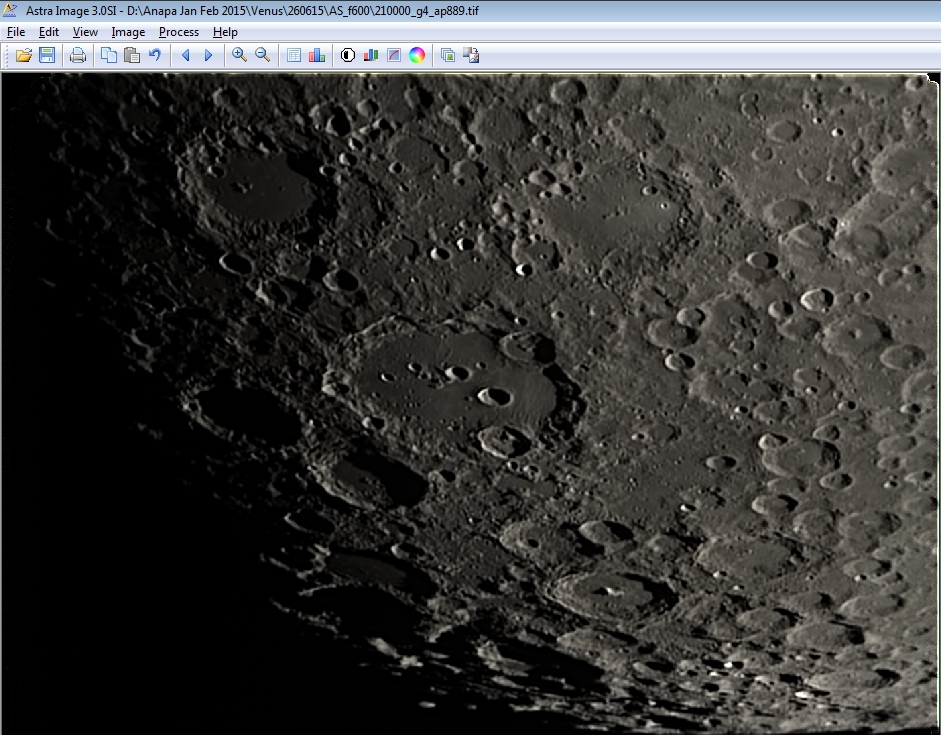
The result was such a handsome frame:
 This is the first option to obtain sharpness. Now the second option is deconvolution.
Open the “blurred” stack, go to PROCESSING> LUCY RICHARDSON DECONVOLUTION
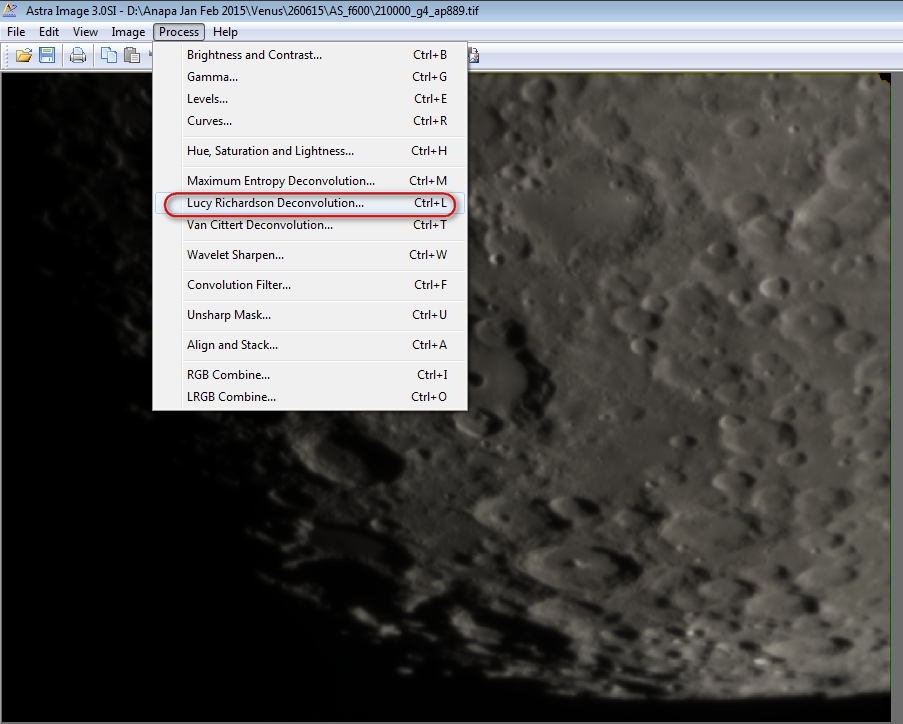
We see the following window:
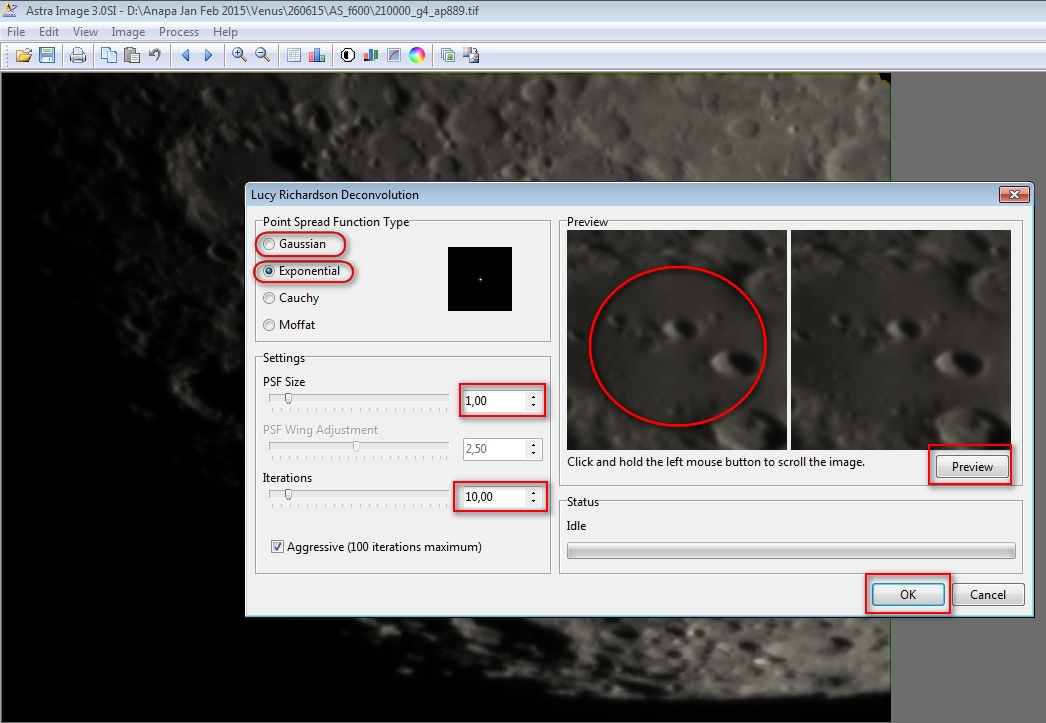
Choose PSF Type, either Explonential, or Gaussian. PSF Size – we leave as long as “1” – the smaller this value, the smaller details are worked out in the picture, however, at values less than 0.7-0.8, noise and artifacts begin to appear. ITERATIONS – the number of steps. The default is 10, you can put 15 or 18. Click the PREVIEW button, we look at the result. The preview window can be moved with the mouse. Not satisfied with the result – try other values.

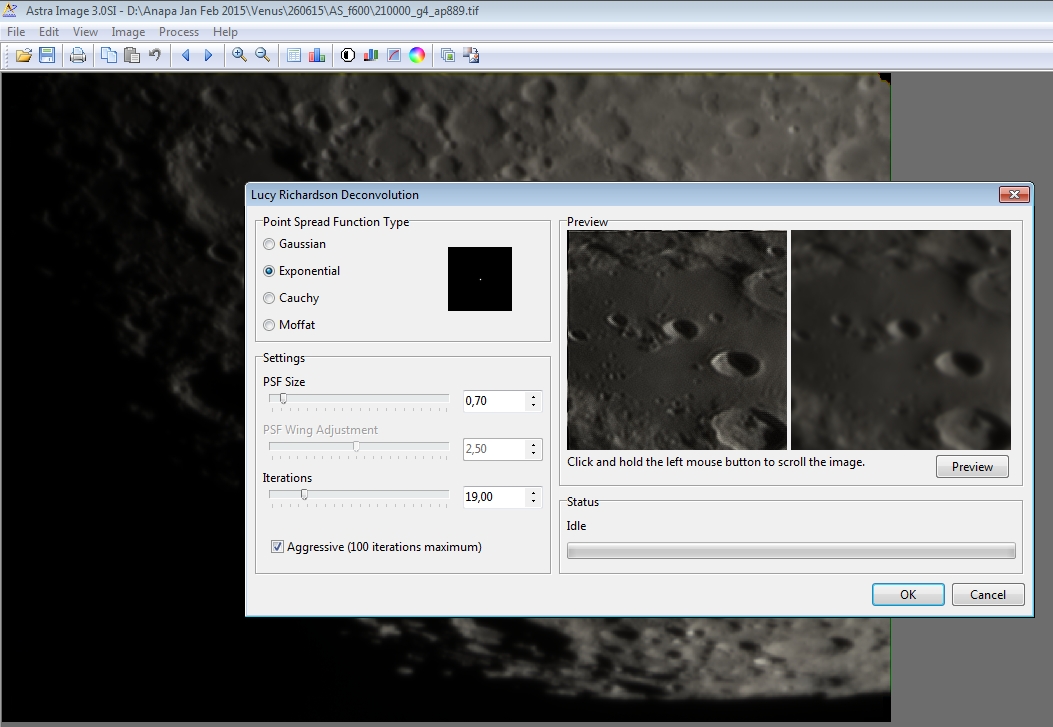

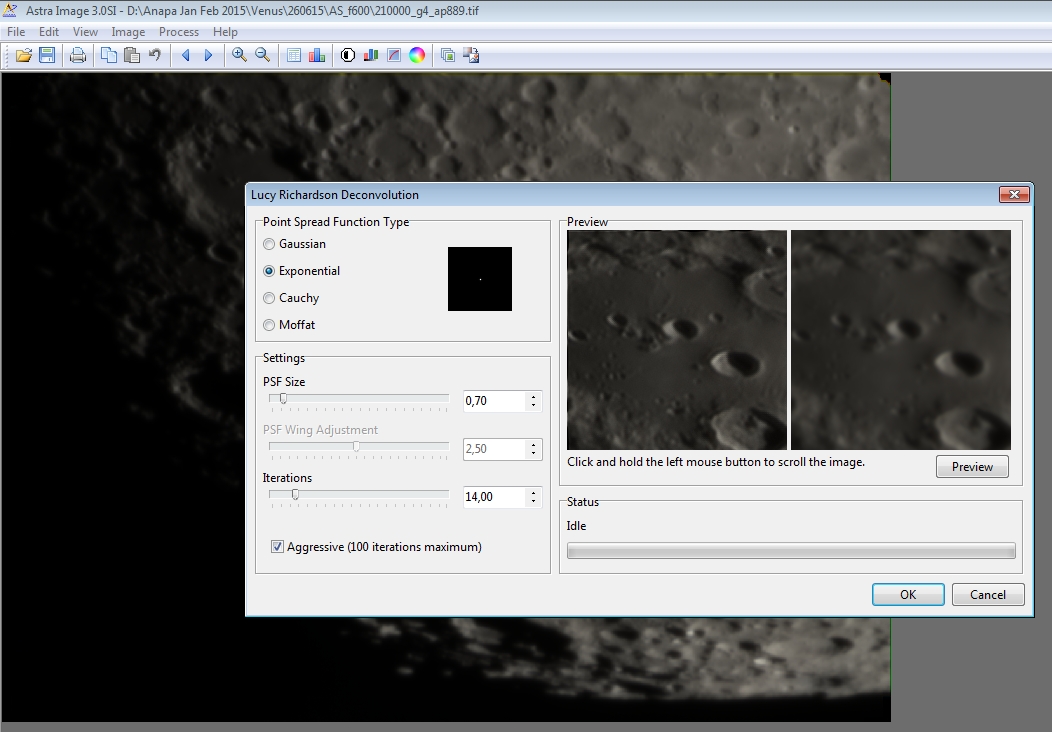

Here, finally, I liked it. Click OK, save the result.
The results of applying wavelets and deconvolution are somewhat different. As a rule, deconvolution allows you to pull out small parts, but wavelets give less noise and better contrast. I prefer to combine both results, laying them on top of each other in a graphic editor.
This is followed by fine-tuning in graphic editors – adjustment of levels curves, noise reduction, etc. Lapping is strictly individual and each astrophotographer has his own (“taste and color”), so I leave you alone with the image enhancements 🙂
