
In this manual I will try to tell you in detail about the method of capturing planets, as well as the processing of the material obtained. As an example the video of Jupiter captured by me on January 4, 2014 at 2:17 will be used. When watching the video you can see two dark spots on Jupiter – this is its satellite Callisto (left) and its shadow (slightly to the right).
Equipment:
-telescope Sky-Watcher BKP150750 on mount EQ5 with drives
-camera Canon 550D (crop 7x videomode, 640х480@60fps, ISO 800, 160 с)
-Barlow lens NPZ PAG 3-5x (+with extender)
Link to source movie: http://yadi.sk/d/w4wy4pl9GxhWy
So, let’s begin!
You can shoot the planet on video through a telescope in several ways.

2) Another way is to use a specialized lunar-planetary chamber of the ASI ZWO 120 MC or QHY5L-IIC type. The budget option – buy a web-camera, unscrew the lens from it, make an adapter (for example, unscrew the metal skirt from the eyepiece and attach the webcam to it with an electrical tape). To shoot the planets, we need a Barlow lens and infrared cut filter (IR-cut). For telescopes with focal ratio 1:7…1:10 and pixel size 3-5 microns, 2x Barlow is required, and for fast telescopes (1:5), 5x or more is desirable. For video capture, you can use Firecapture or SharpCap. The Microsoft Lifecam Cinema webcam has proven itself well. For smaller pixel (2.4 microns) you need Barlow lens with less multiply factor.

3) The third way (which we will use) – instead of a webcam, we need a DSLR with video recording function. The camera lens in this case is not used – instead of it, a Barlow lens (with a T-adapter) and a T-ring (an adapter ring from the telescope’s thread to the camera’s bayonet) are installed. I recommend using Canon cameras. You can record a video stream to a computer (via a USB cable using EOS Movie Record http://valexvir.narod.ru, for all models older than Canon 1000D, an additional 5x zoom should be included when shooting planets), or directly into the camera (Canon 550D , 60D, these models allow you to shoot video not entirely from the matrix, but from its small part, with a resolution of 640×480 and 7x approximation, with a frequency of 60 frames per second, and 600D and newer models – to record video with a digital zoom). You can read more about shooting planets for Canon cameras from my other article: www.star-hunter.ru/en/canon550d-zwo120mc

Suppose we could get a video of the planet. Let’s start processing!
I. Trimming the planet’s video in PIPP.
PIPP (Planetary Imaging PreProcessor) – excellent program for trimming videos of the Moon, Sun, planets. HUGE number of settings. It can itself select frames by quality, there is batch processing. It is especially valuable for astrophotographers who shoot planets through telescopes on the Dobson mount – the program is capable of discarding frames on which the planet goes beyond the edge of the frame. The site has quite detailed instructions for using the program. Program website: sites.google.com/site/astropipp/home
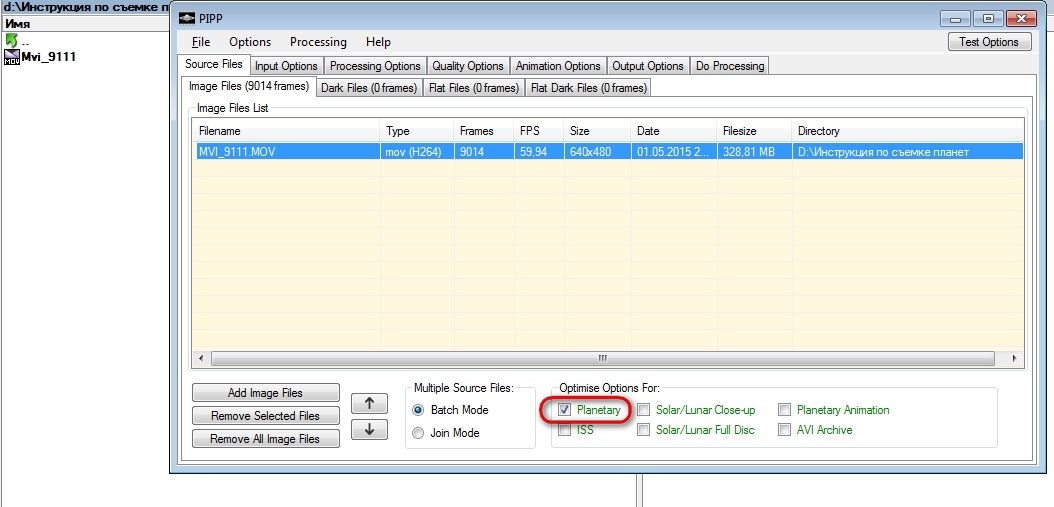
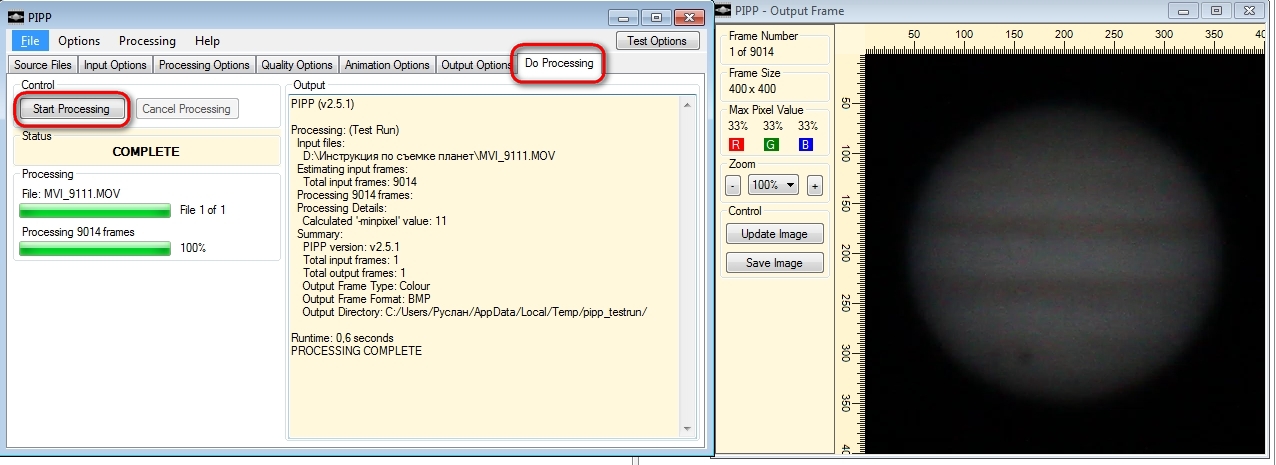
Run the program, dragging the movie of the planet right into the program window. Put a tick where it says PLANETARY.
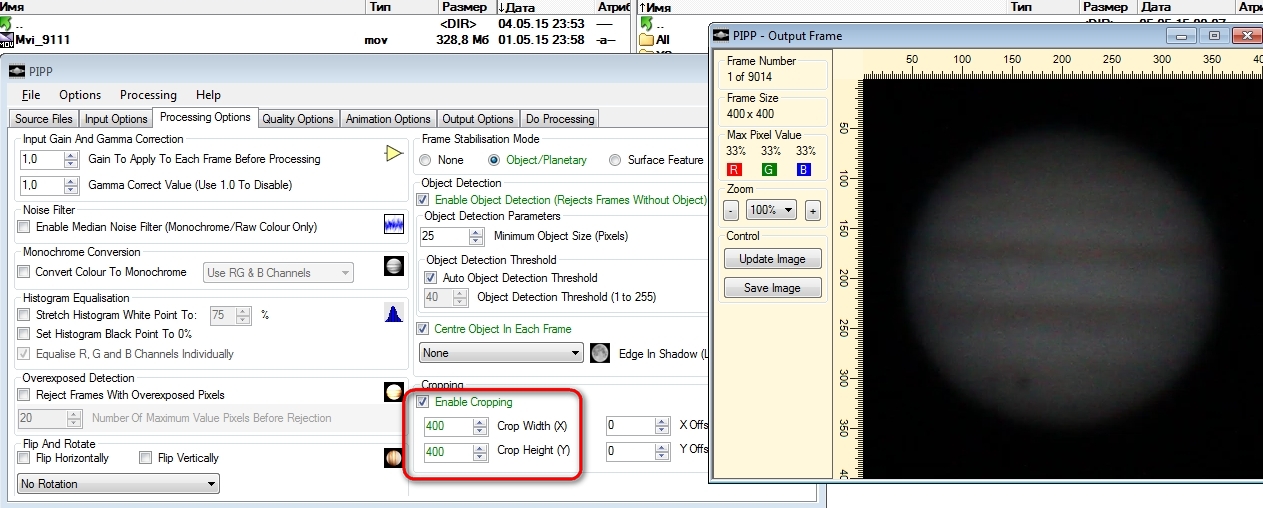
Then press the TEST OPTIONS button (at the top right) – a window with a single frame will appear. We need to remove this extra dark field. To do this, go to the PROCESSING OPTIONS tab and in the ENABLE CROPPING section set the size of the planet in the image (by default there is 448×448). We enter in approximate figures and we press TEST OPTIONS – again there will be a single frame, but already cut off. The planet should be placed in the picture with a small margin. If the planet does not fit into the frame, then you need to drive in other numbers. In this case, the values 400 and 400 are suitable for us.
After this, go to the DO PROCESSING tab, press START PROCESSING there and wait. After trimming, the program will open a folder with a cropped clip, which you can feed to Autostakkert.
A new folder “pipp_20150505_001335” has appeared in the folder with our source video. Go to it and see the trimmed and aligned file MVI_9111_pipp. Do not pay attention to the fact that it increased from 328 megabytes to 4 gigabytes – this is normal 🙂 Close the PIPP.
II. Selection and addition of frames in Autostakkert.
Autostakkert – simple and user friendly program designed to select and add frames. Download it at the link: astrokraai.nl/software/latest.php
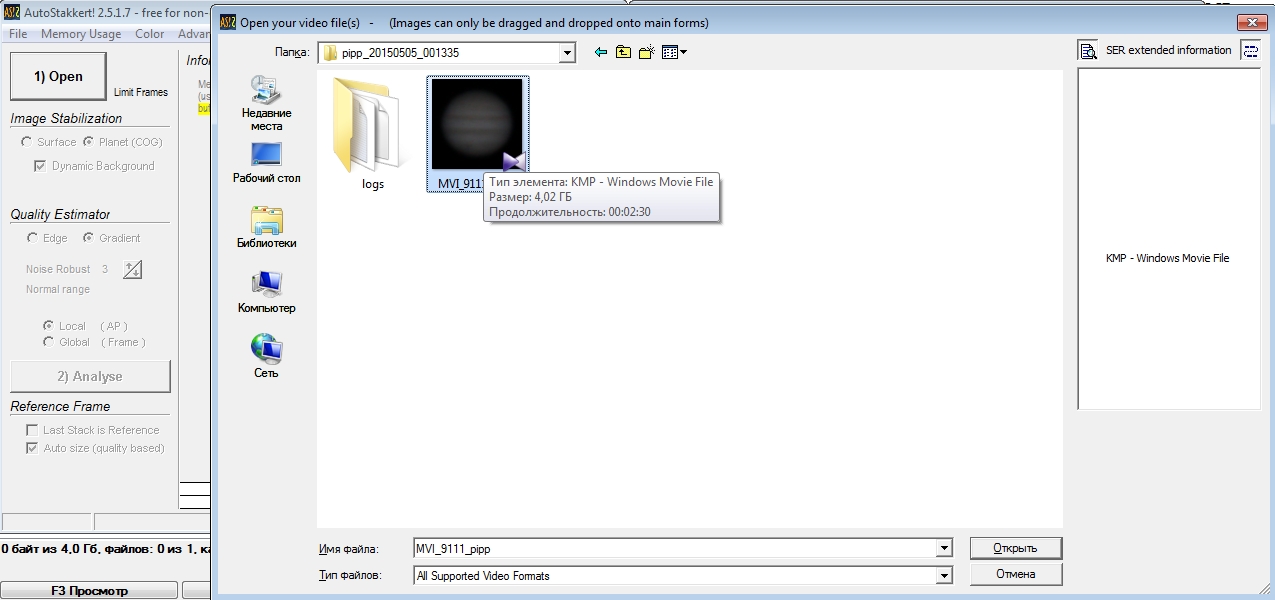
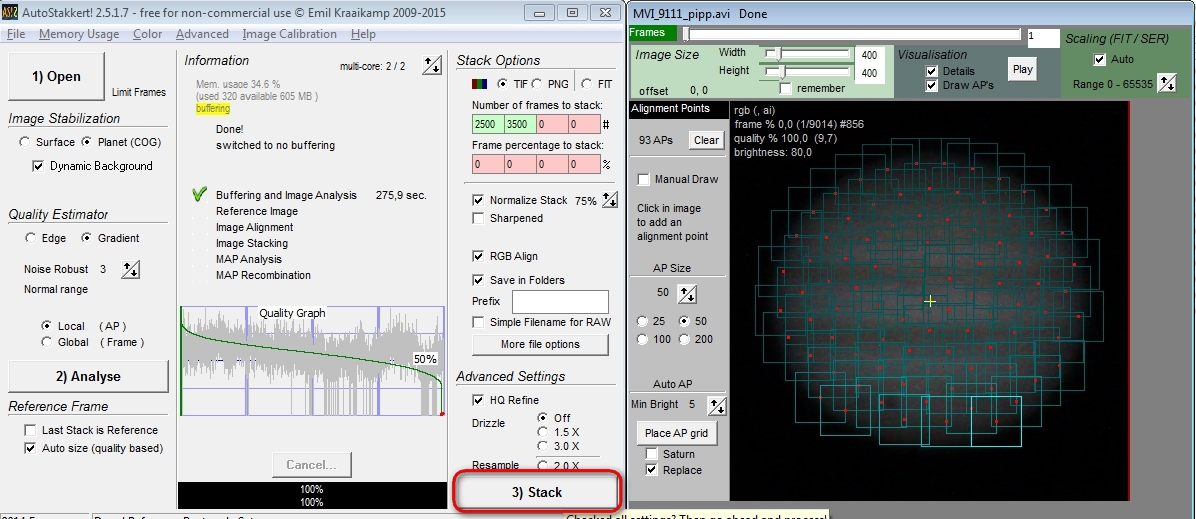
Download, unpack, run. We see two windows. We press 1) OPEN, we find our cut clip, open.
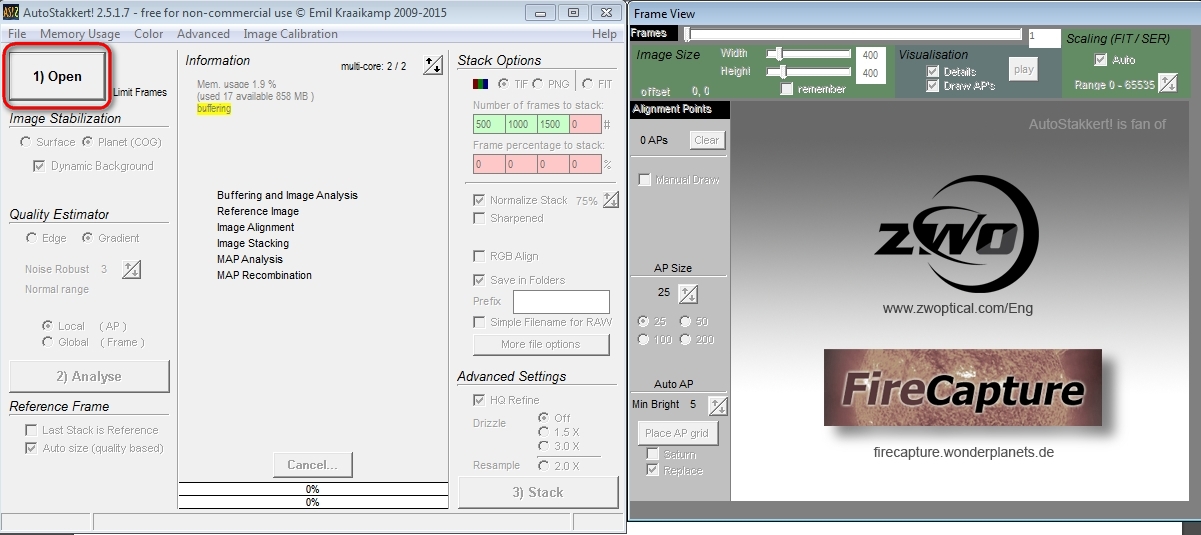
We are looking for a tick PLANET – this is the choice of the type of object being processed.
Put a tick on the item NORMALIZE STACK 75% – this is an automatic alignment of brightness.
Put a tick on the item RGB Align – this alignment of color channels, the displacement of which is caused by atmospheric dispersion (refraction of light in the earth’s atmosphere). Without RGB Align, the final image will be red on one side, and blue on the other, and the lower the planet above the horizon, the stronger will be the effect of atmospheric dispersion.

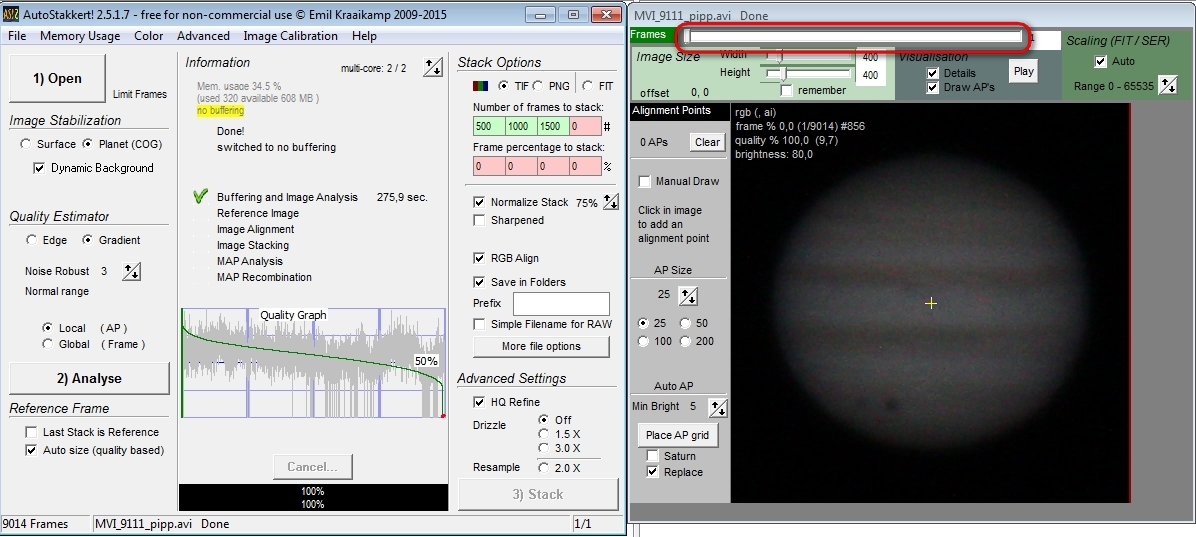
 Next, you must specify the points for addition. In Autostakkert there are several options for addition – one point at a time and several at a time. Single-point alignment works well for images of small planets (Venus, Mars), while large images of planets with fine details work well for multi-point alignment.
In order to put a single point, put a tick on the item MANUAL DRAW, click once with the left mouse button on the image of the planet approximately at the top left and move the cursor down to the right. After the blue rectangle touches the contours of the planet, you should click the left mouse button again. Everything, the planet is highlighted.
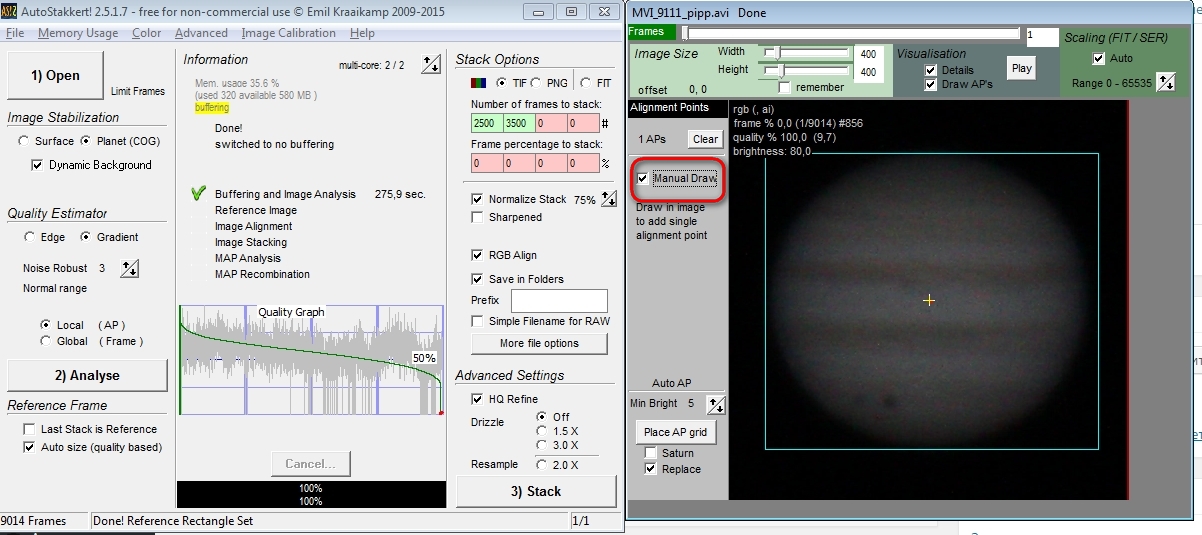
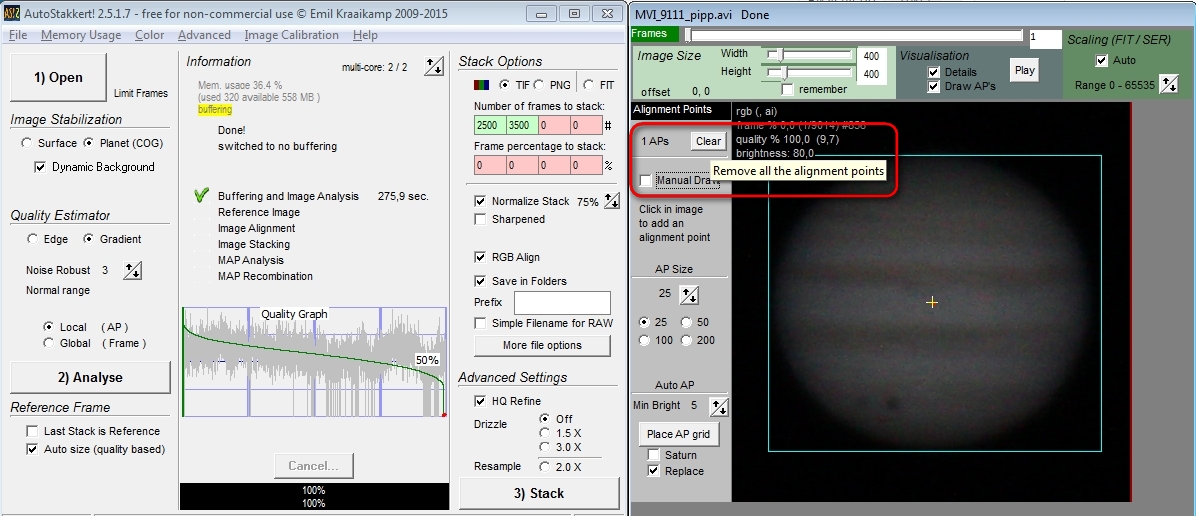
However, we will still use multi-point alignment, since the image of the planet has turned out to be very detailed, even on single frames. Remove the checkbox MANUAL DRAW, press the button CLEAR
Then select the point size (AP SIZE) – for example, 50, and press the PLACE AP grid button.

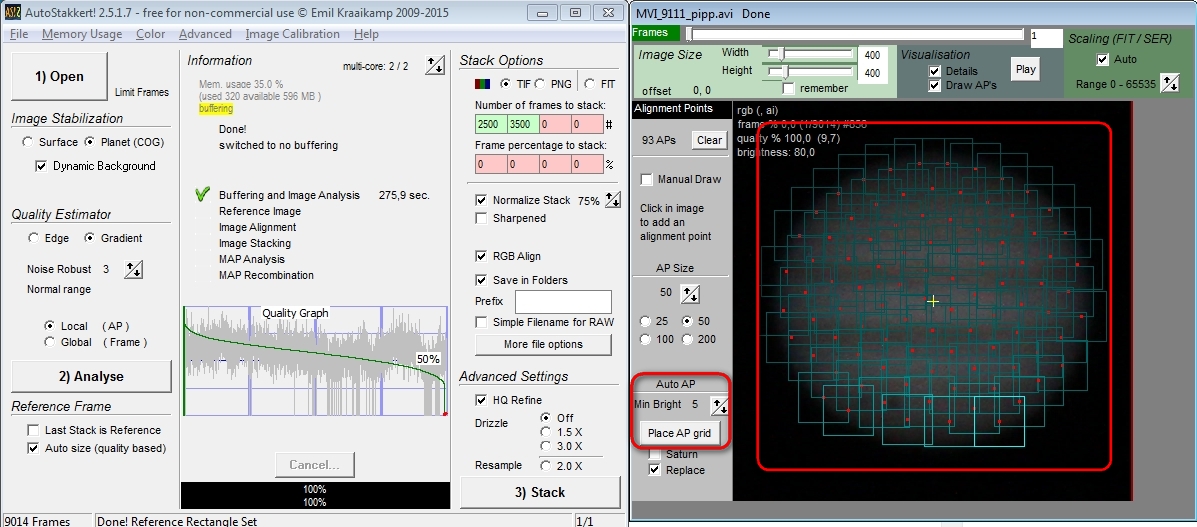 On our image many points are now visible. Their number is shown above (93 APs). If you see very small details, it makes sense to reduce the size of the points. To re-arrange points, you must first remove them (CLEAR button), select a new point size and press PLACE AP grid again.
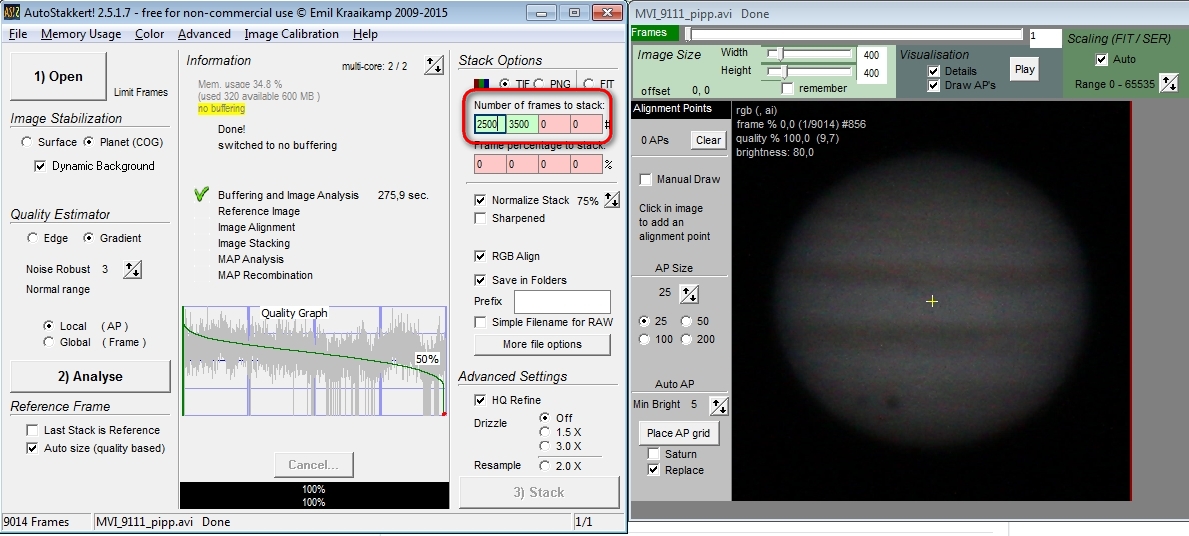
If the number and size of points suits you, go to the addition. Press the button 3) STACK and wait – green ticks should be set in the main window of the program near each of the items. The processing time depends on the performance of the computer’s processor. In terms of the “price / performance” ratio, Intel Core i5 processors are currently the most optimal. On computers with weaker processors, the program will also work, just processing will take longer.

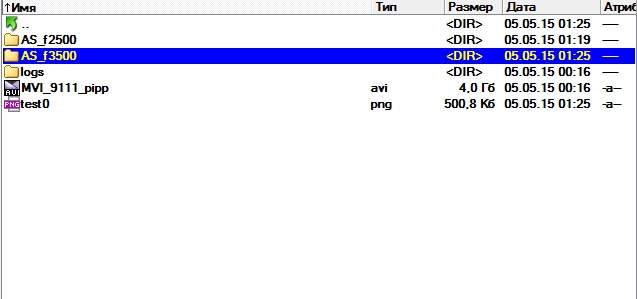
After processing, we will get as many as three folders next to our video – the result of the stacking 2500 and 3500 frames from 9014.
https://www.astronomie.be/registax/

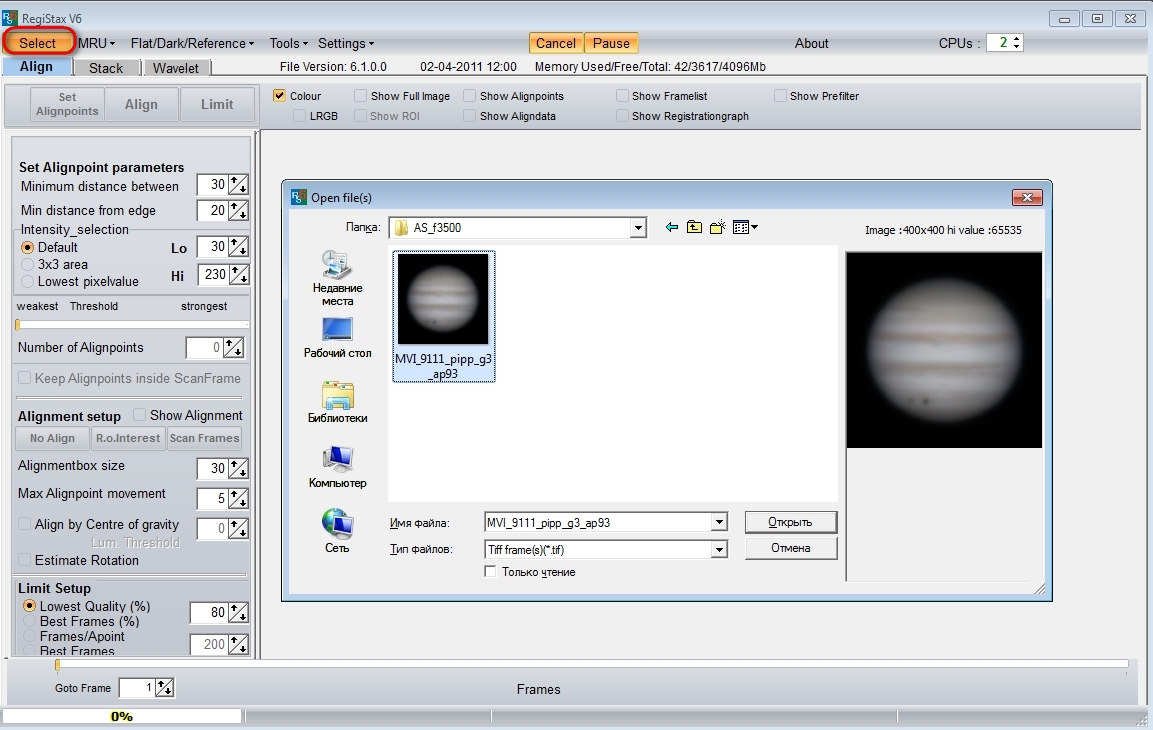
III. Wavelets and auto balance in Registax 6.
Download the Registax program, install, run, press the SELECT button, find our blurred file and open it.
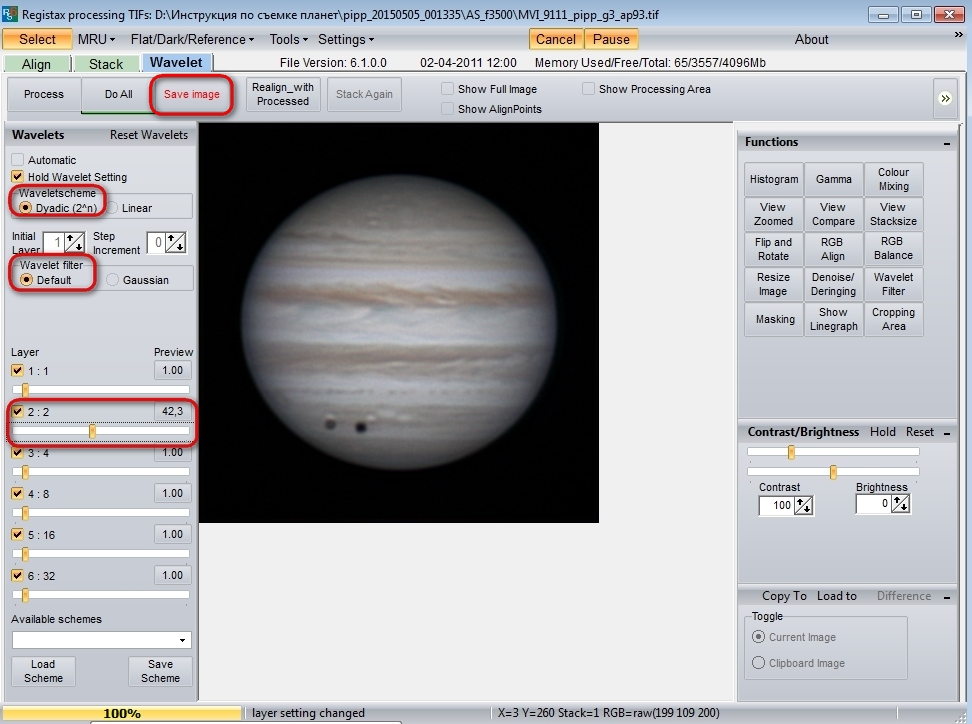
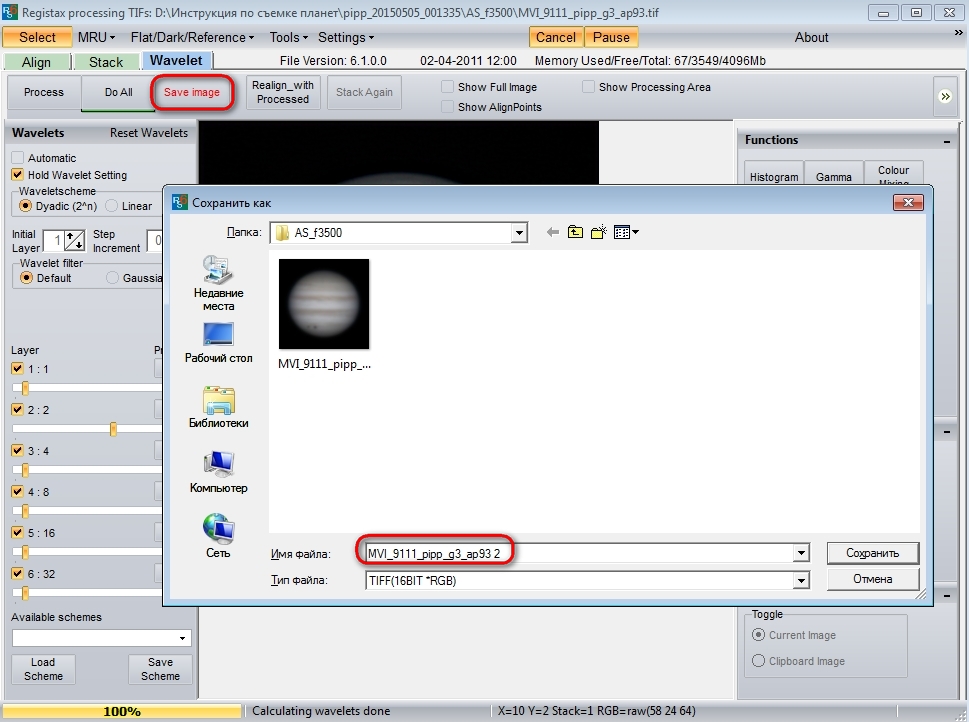
We will work with wavelet sliders, which are shown in the picture below. With low-contrast images, I usually work this way – I tick off WAVELETSCHEME – Dyadic (2 ^ n), WAVELET FILTER – Default. The top slider is responsible for the smallest details, the bottom one is responsible for the largest and the contrast. I mainly work with the second or third sliders – the top slider only adds noise.
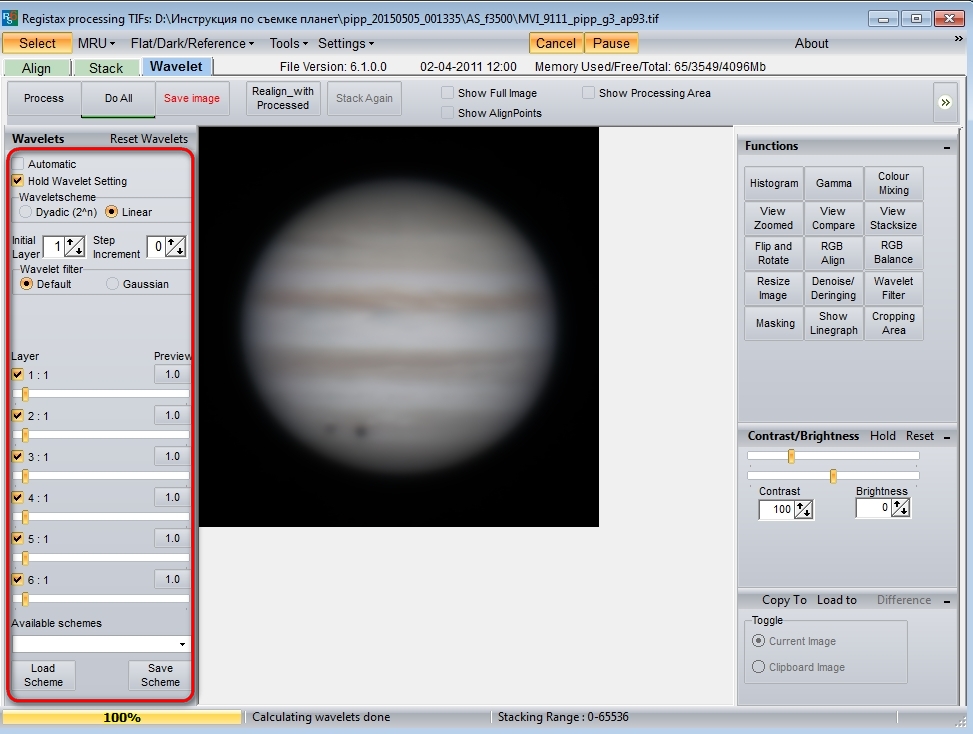
Let’s try to move the second slider to the right. If you are satisfied with the result, I recommend saving the image by pressing SAVE IMAGE.
And this is how the third slider affects the image.
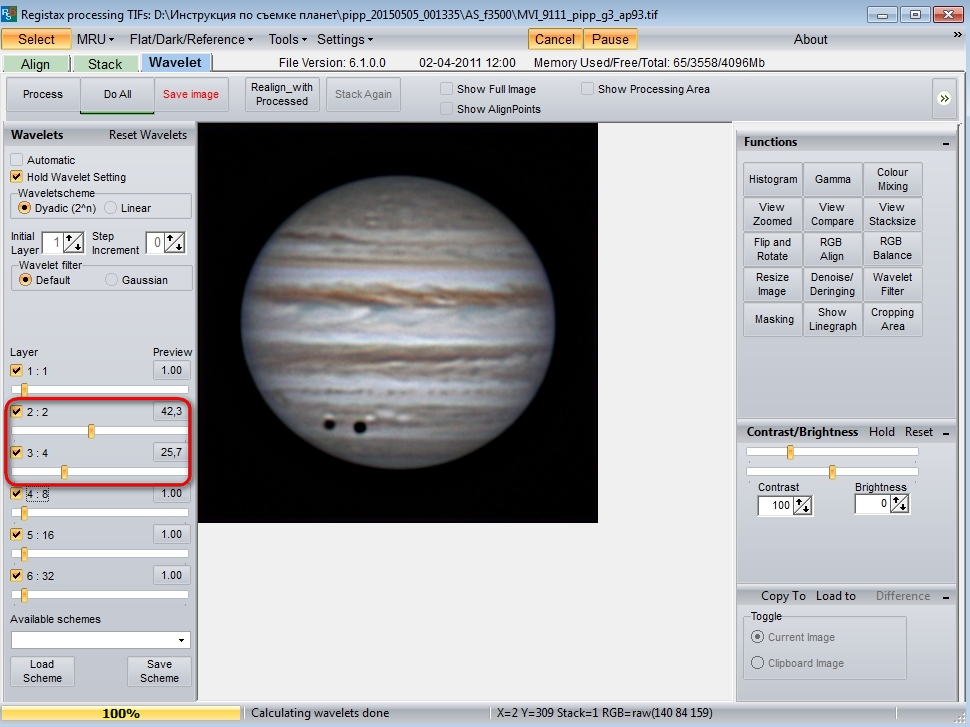
It is necessary to select a balance of wavelets so that the image is detailed, but at the same time remains natural and does not look too reworked. However, this is a matter of taste of every astrophotographer 🙂
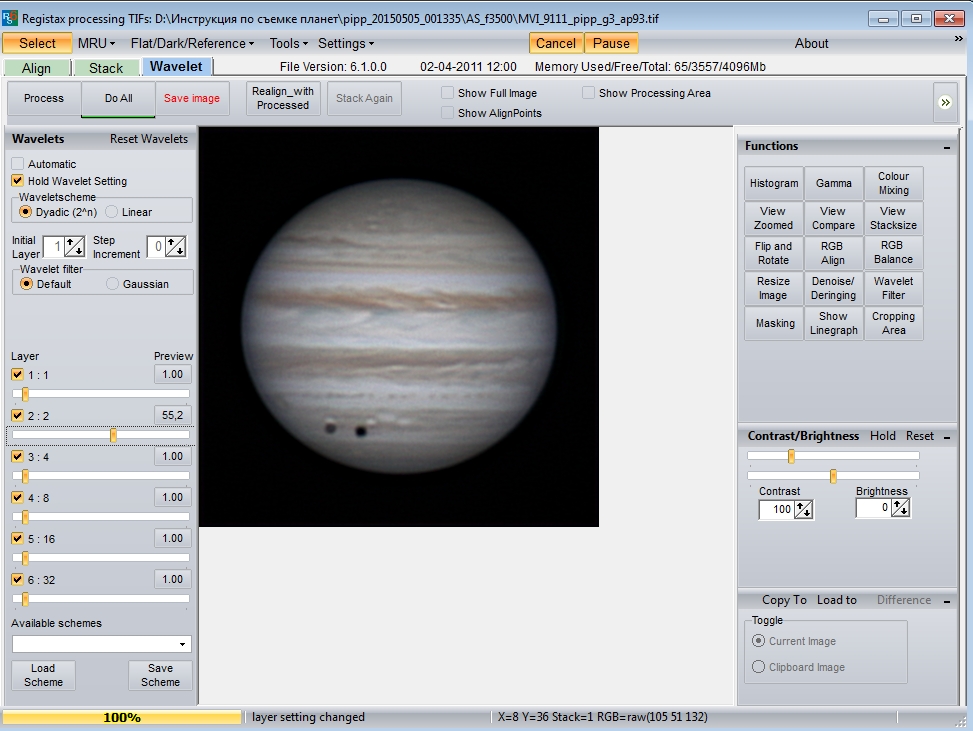
Suppose we liked this wavelet scheme. By the way, the scheme itself can be saved by pressing the SAVE SCHEME button.
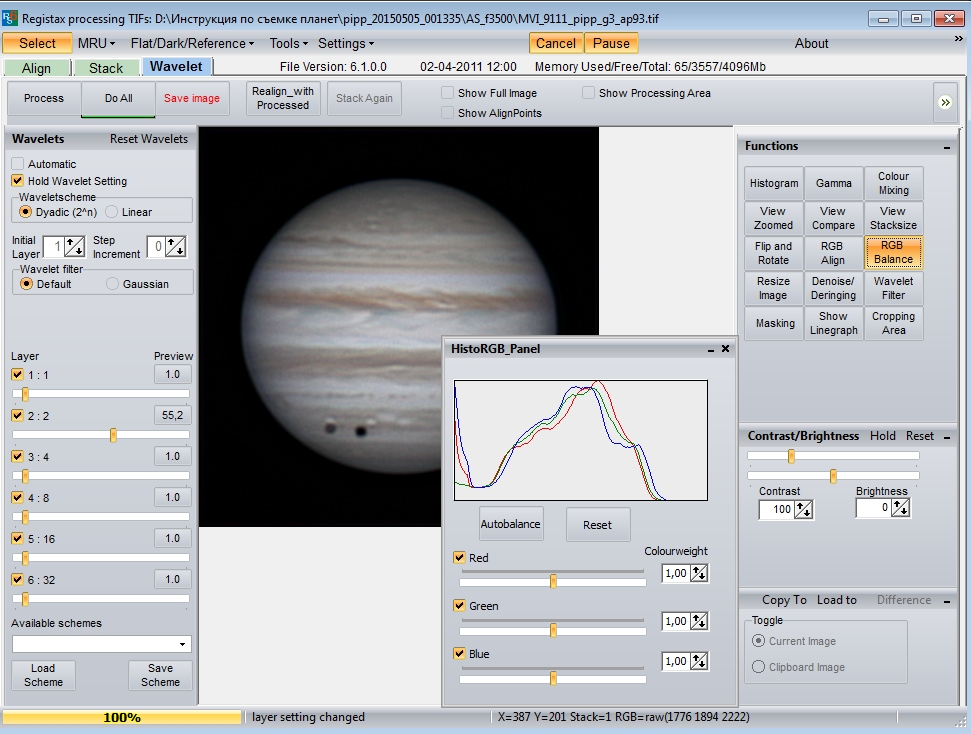
After that, it remains to correct the color balance. I really like the way Registax’s automatic color balance works. Select the RGB Balance item on the program panel and then click the Autobalance button in the window that appears.

If everything is fine, then we save our file under a different name in TIFF format. In JPEG we do not save – the picture deteriorates noticeably due to strong compression ..
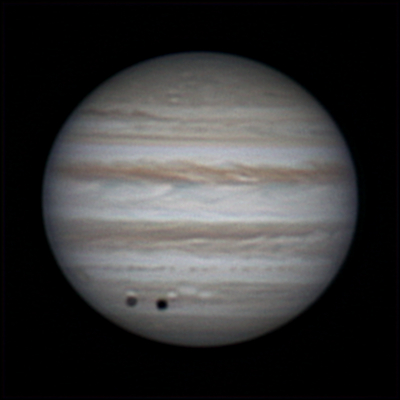
Now I can congratulate you on the first processed video 🙂 Here is our result.
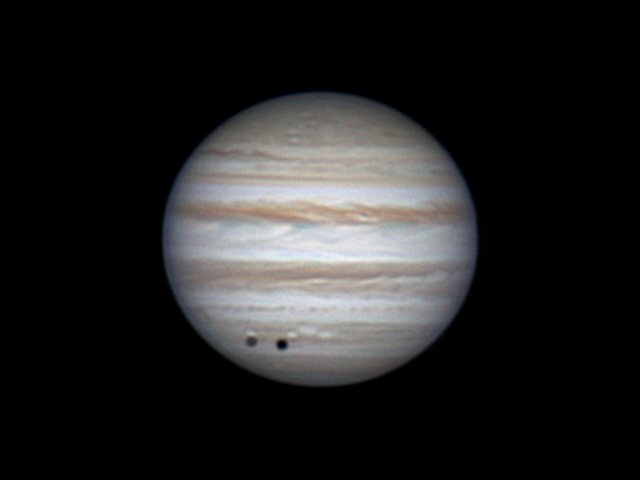
Further processing in graphic editors is reduced to the correction of levels, curves, color, application of noise reduction. Processing is purely individual, to “your taste.” I try to both preserve the naturalness of the image and highlight low-contrast details. Here, in fact, my final version of processing – corrected levels, added saturation.
Let’s look back a second and look at a single frame from the video:
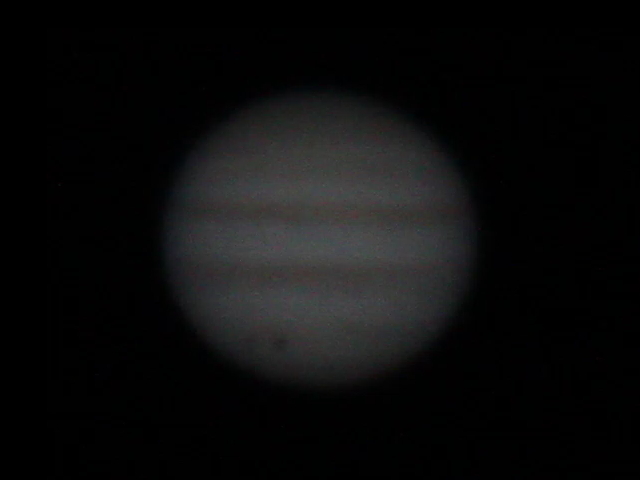
The difference is impressive, isn’t it? 🙂 As they say, miracles must be done with your own hands 🙂 I am sure that now you will succeed too. I wish you a relaxed atmosphere and great pictures!
Update as of May 4, 2016.
Added a video about the processing of Jupiter:
Jupiter’s video was obtained on April 11, 2016 at 21:01 with telescope Celestron NexStar 8 SE telescope, Barlow lens Sky-Watcher 2x with a T-adapter, ZWO ADC dispersion corrector, ZWO IR-cut filter, ZWO 224 MC camera. Location: Russia, Anapa, backyard.
Source movie in SER format and stack: https://yadi.sk/d/Sj-vHANXrUgJb
