When shooting fast-rotating planets (Jupiter, Saturn) with color and monochrome cameras, the following limitation arises: the duration of shooting a single video clip should not exceed a few minutes. Due to the rapid rotation of the details of the planets blurred when added. This is especially critical when shooting with monochrome cameras, where very little time is left for shooting each channel. The program WinJUPOS allows you to compensate for the rotation of the planet, using several images as a texture and “pulling” them on a virtual globe.
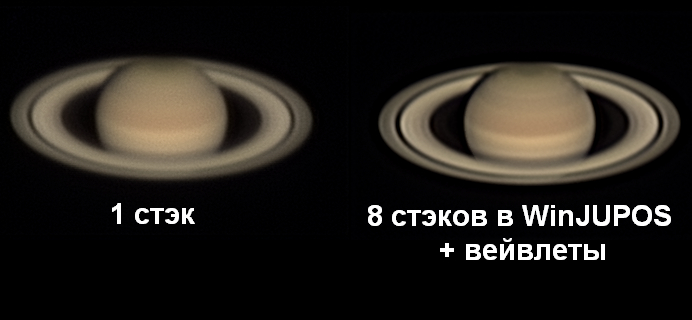
Initially, WinJUPOS was supposed to process material from monochrome cameras, but I successfully use this program to work with a color camera. At the same time, the image detailing improves, fine details are better drawn, the picture becomes less noisy. In this manual, I’ll tell you how to stack colored stacks in WinJUPOS. The process of shooting is that we shoot not one clip, but several with a small interval. Then we process each video, we get the result of the addition (stack) and apply wavelets to each stack. You can find out how to shoot planets in general in the corresponding article. https://star-hunter.ru/en/planetary-imaging/
Download WinJUPOS can be absolutely free here.
We also need Registax
Suppose you got a number of stacks and applied wavelets to them. Stacks for training you can download the link: Stacks_for_WJ_Saturn_06_07_2015
-telescope Celestron NexStar 8 SE
-Barlow lens Sky-Watcher 2x with T-adapter
-Baader Q-Turret
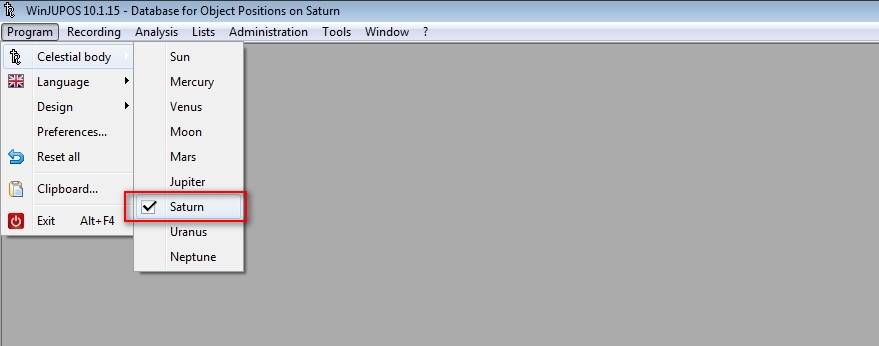
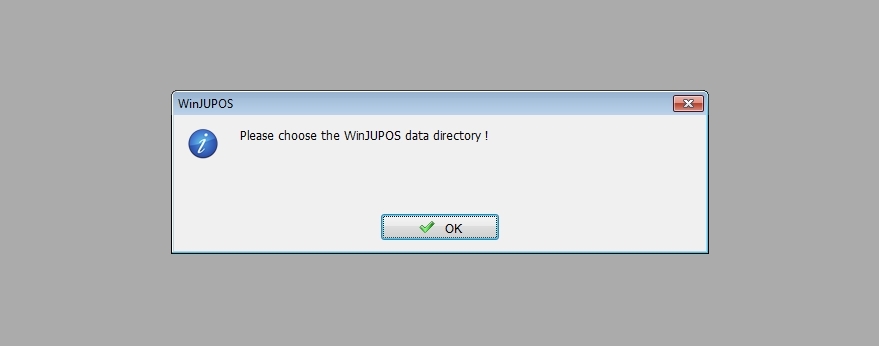
-camera ZWO 120 MC.Each of the stacks is the result of the addition of 1500 frames from 4994, the duration of each video is 3 minutes. After the addition, wavelets in the Astra Image program are applied to the stacks.Download WinJUPOS (hereinafter for simplicity, simply WJ), install, run. Select the type of planet, specify the working directory (folder with stacks):
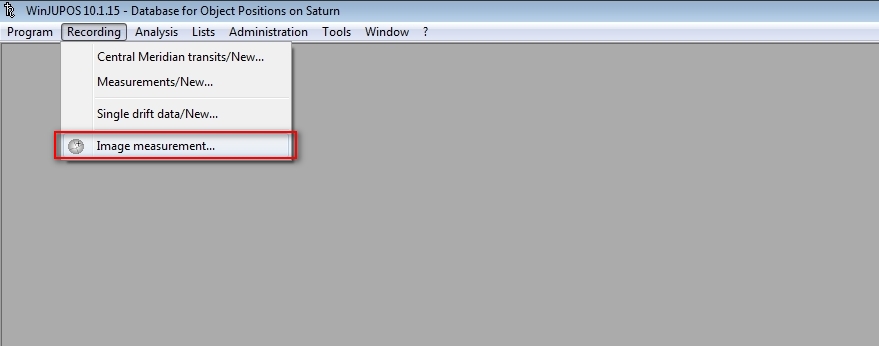
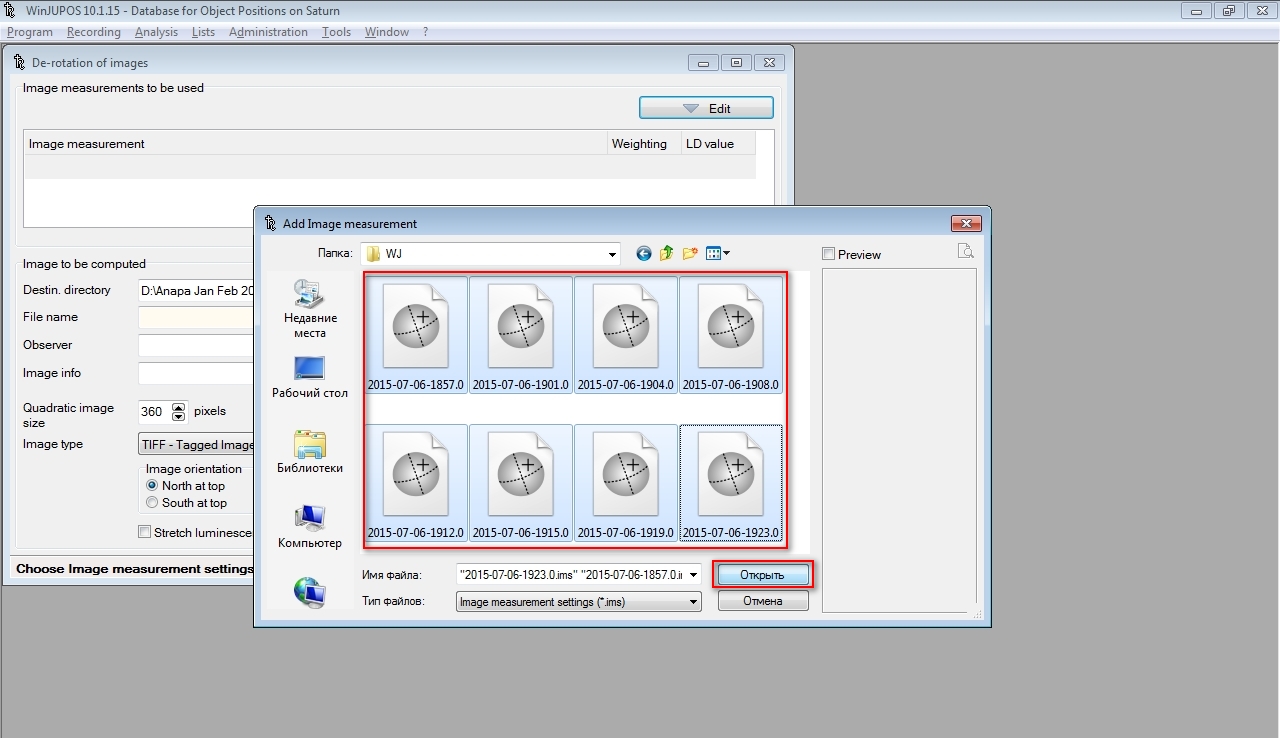
Next, go to the “image measurement”:
Click the OPEN button, open the first stack:
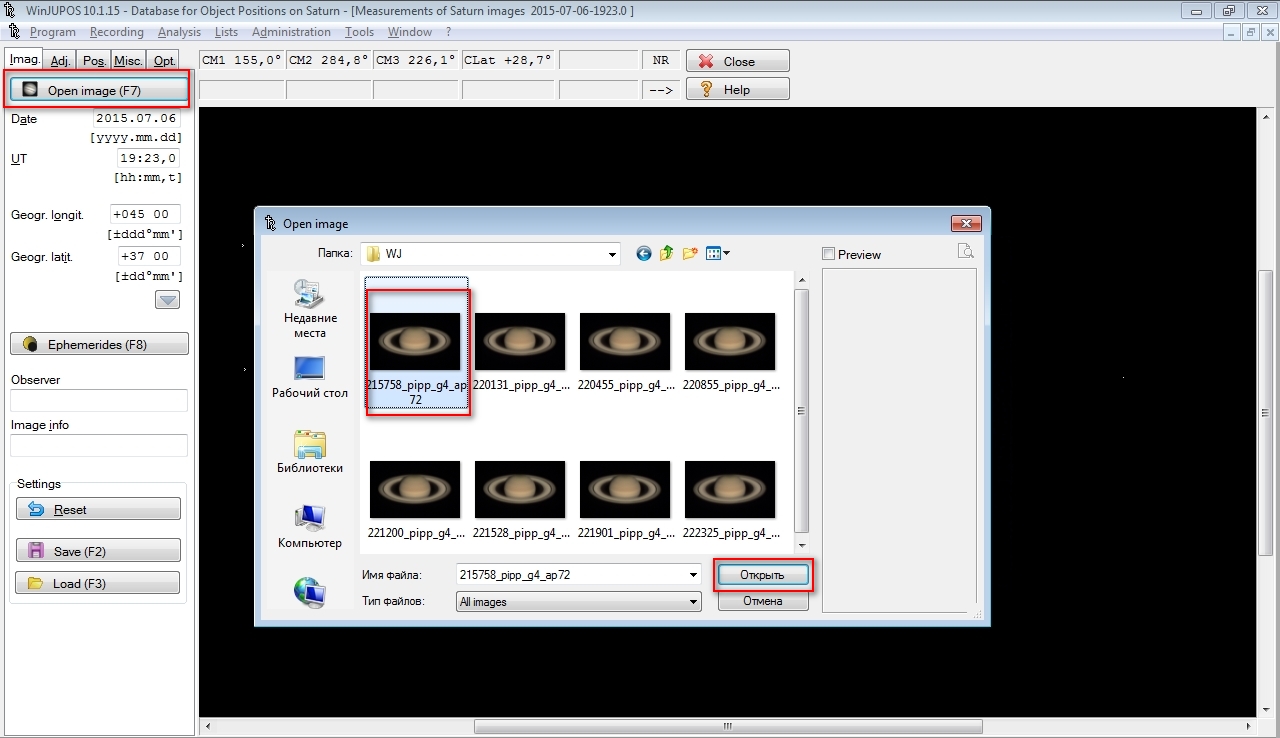
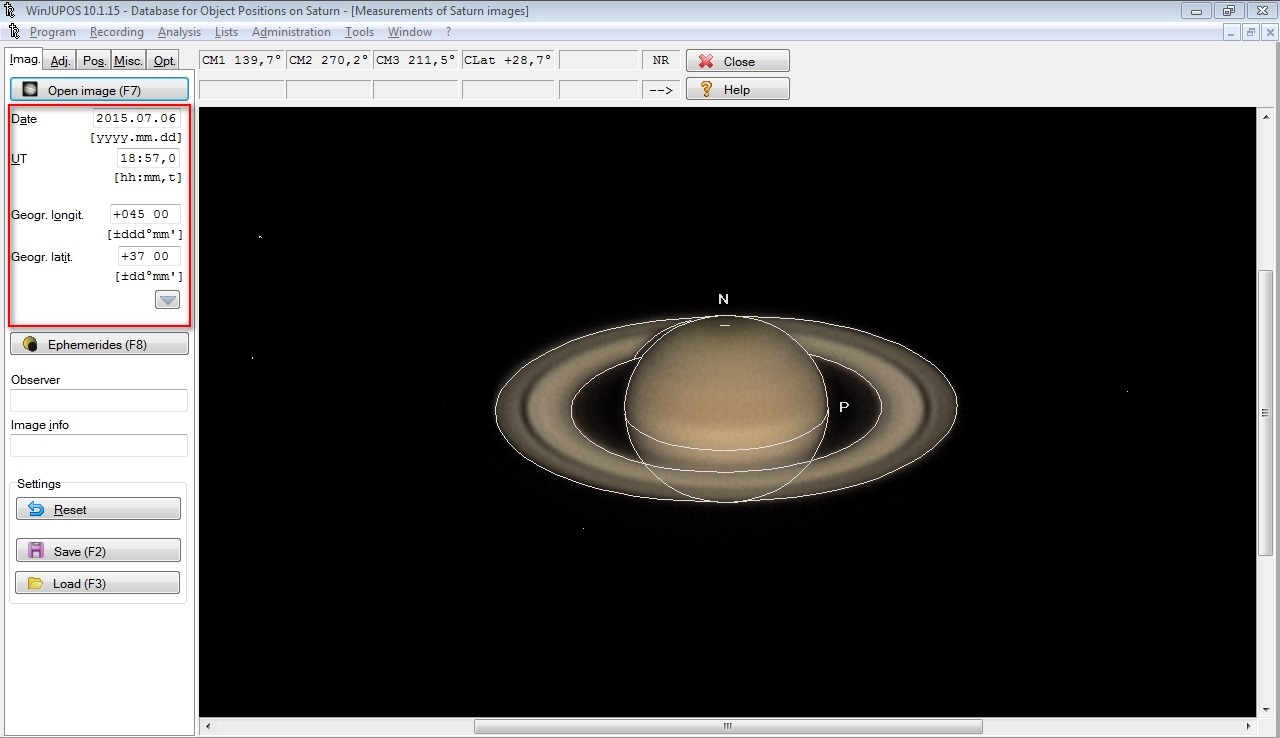
We see such a picture – the planet, a contour-template is superimposed on it. In my case, the image is already aligned, but you will need to rotate the template and adjust it to fit the size of the planet, it is easy. First, we fill in the date, time (international) and geographical coordinates of the location of the shooting. The shooting time of each stack is indicated in the file name – for example, the stack 215758_pipp_g4_ap72 was shot at 21:57 local time and at 18:57 international time (minus three hours). It is 18:57 and we score in the appropriate field. In theory, it is more correct to specify the time between the beginning and the end of the recording of the video, but for simplicity we will use only the start time of the recording. When shooting a planet near midnight, be careful with the date!
Go to the ADJ tab:
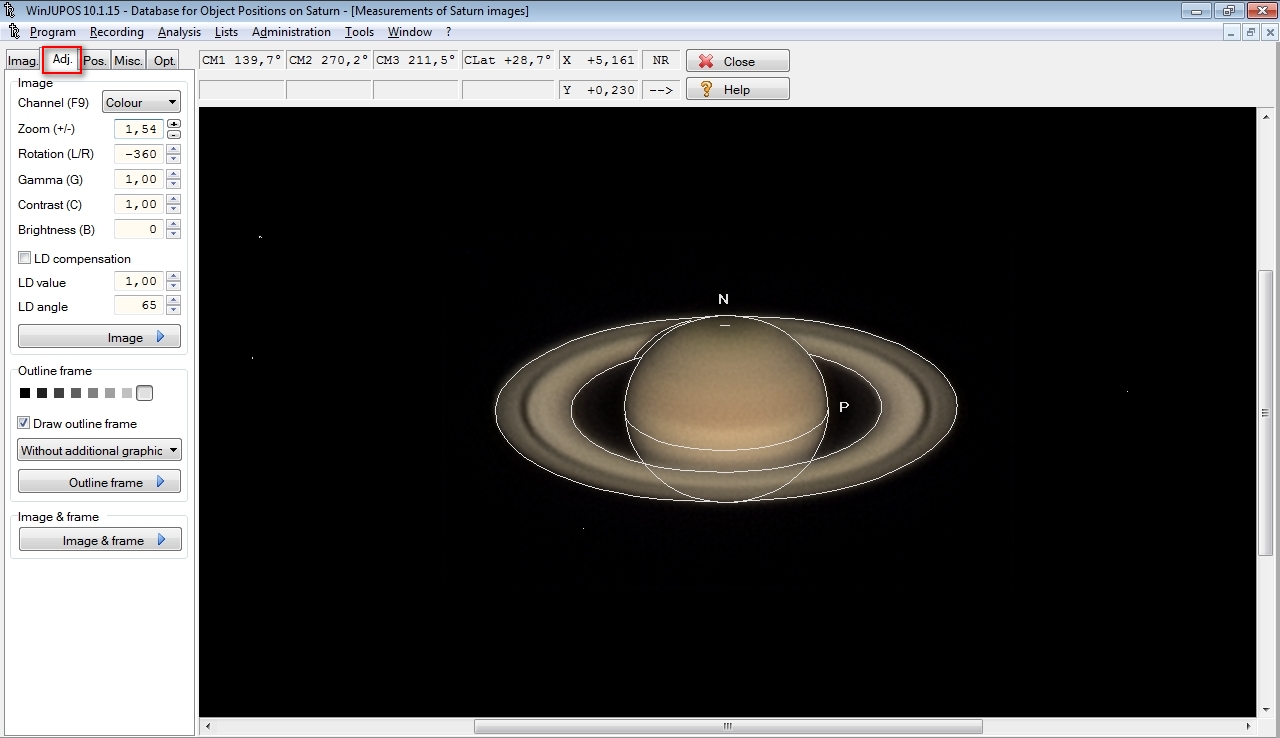
Next with the image you can perform the following operations:
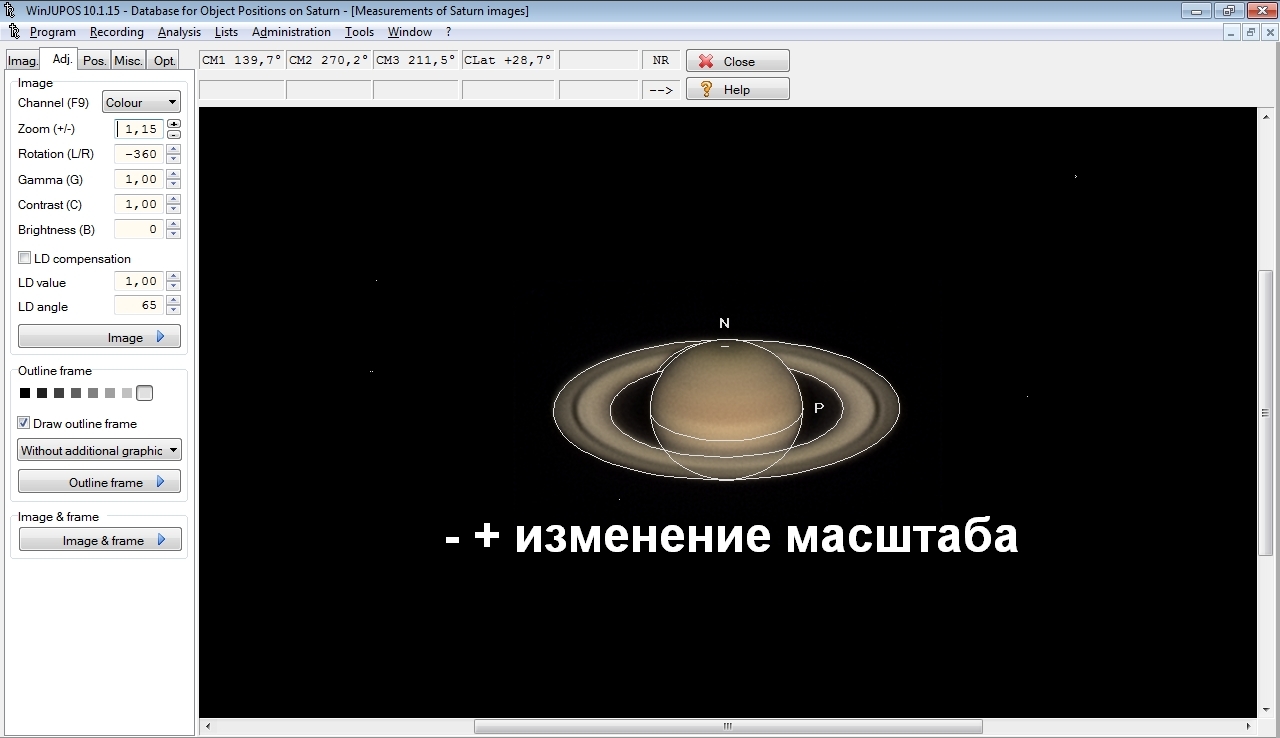


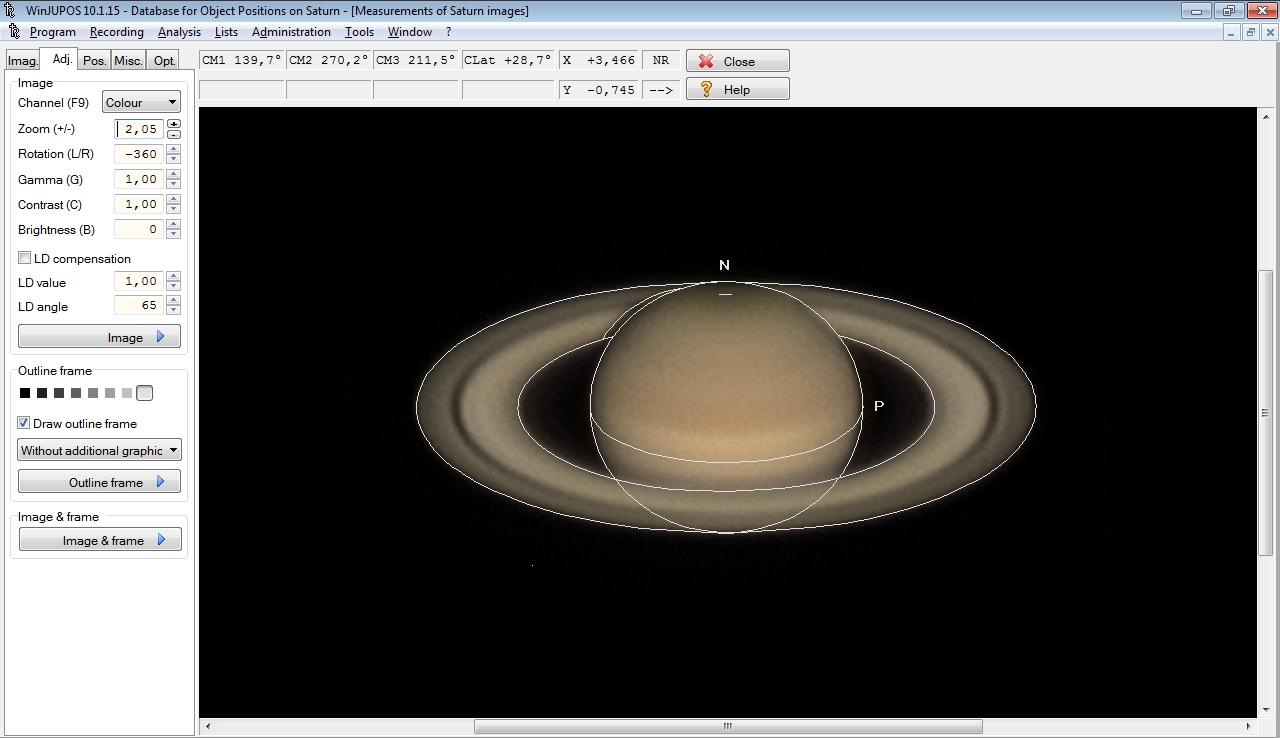
Your task is to impose a pattern exactly on the contour of the planet.
Important note: when processing the stacks of Jupiter, just press the F11 button, and the image will automatically align. Alas, with Saturn, this trick does not roll.
Well, it turned out:
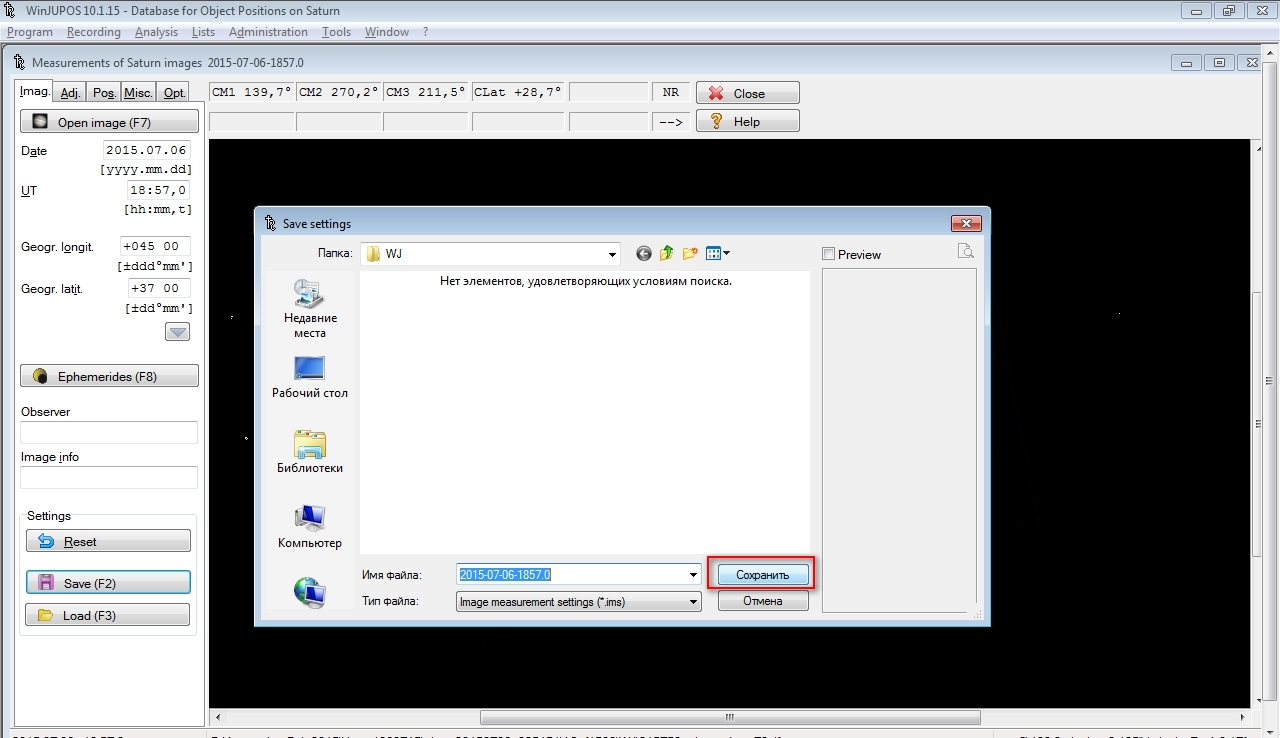 Do the same with the rest of the stacks. We should have as many * .ims files as there are stacks.
Now we turn to derotation, that is, we “stop” the rotation of the planet:


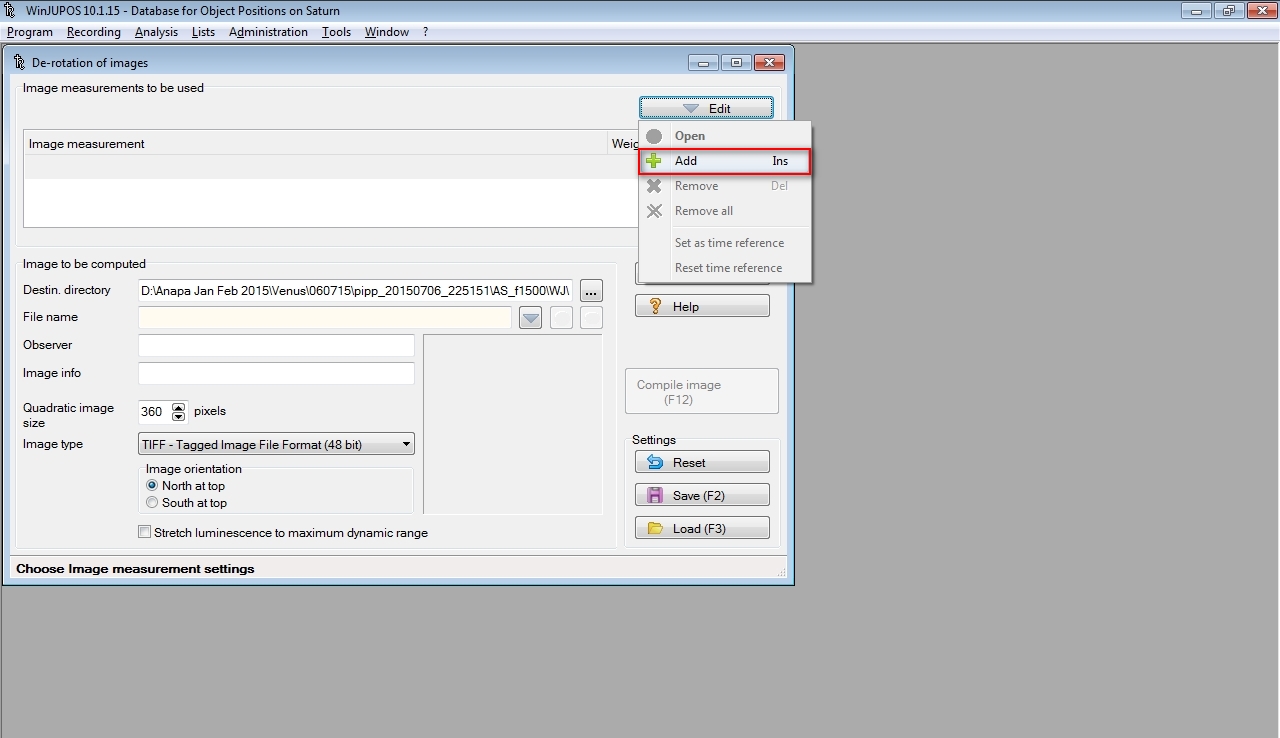
Open our * .ims files:
We see such a window, press the button COMPILE IMAGE:
 We get the result:

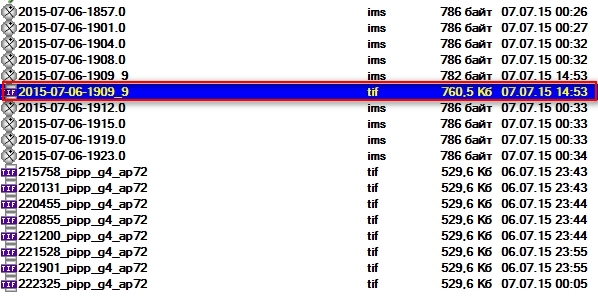
Next to our stacks and * .ims files, the result of derotation appeared. It is with him that we will continue to work.
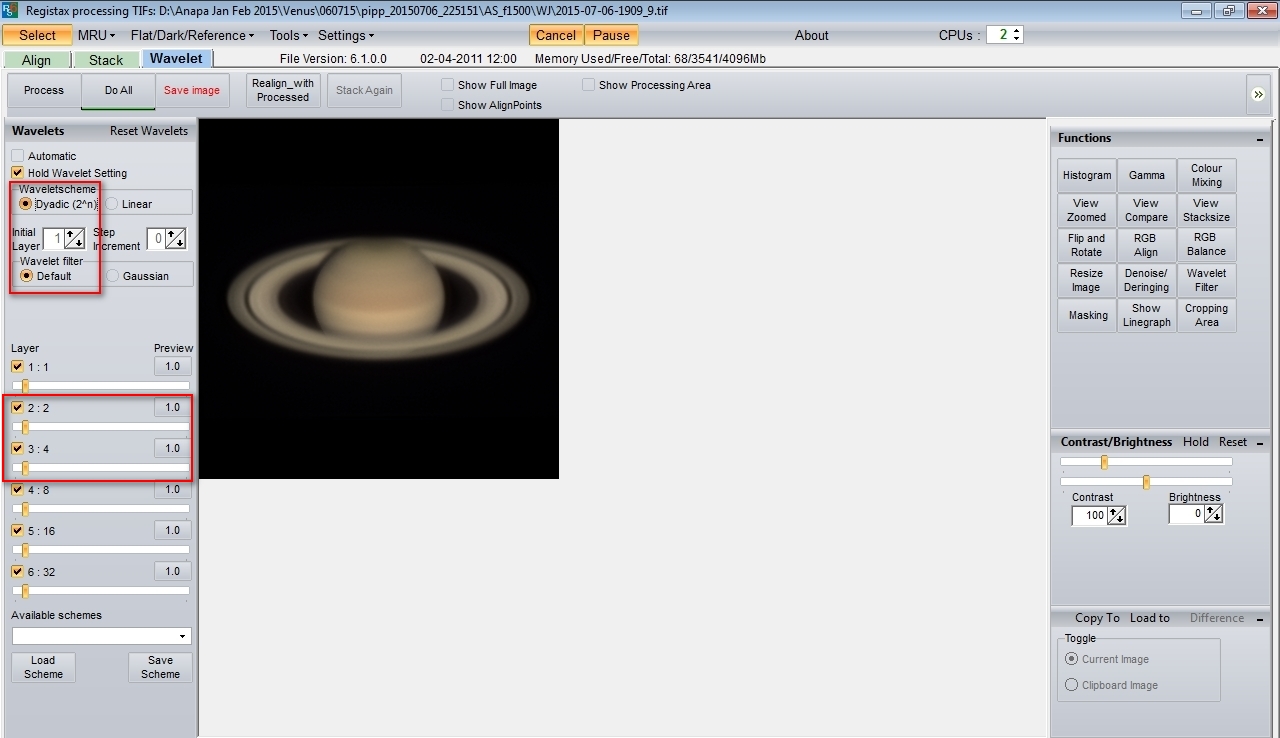
 Launch Registax, open the result of derotation:


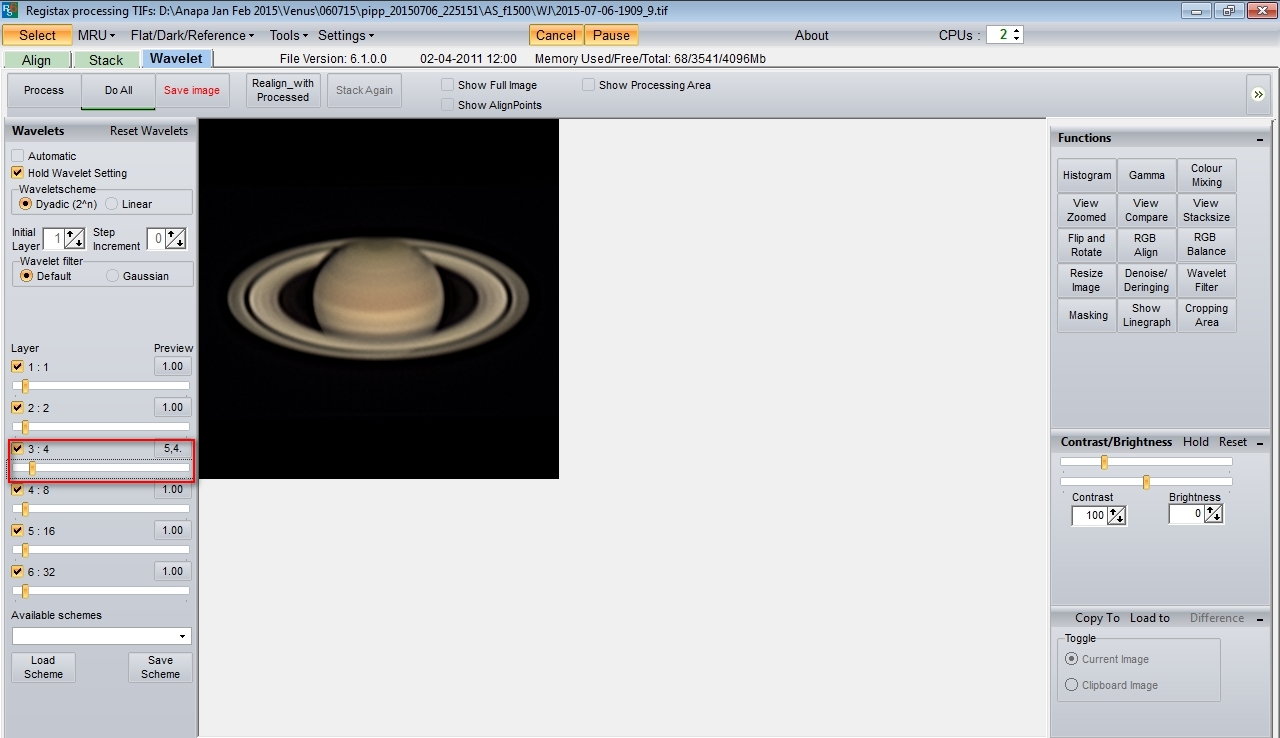
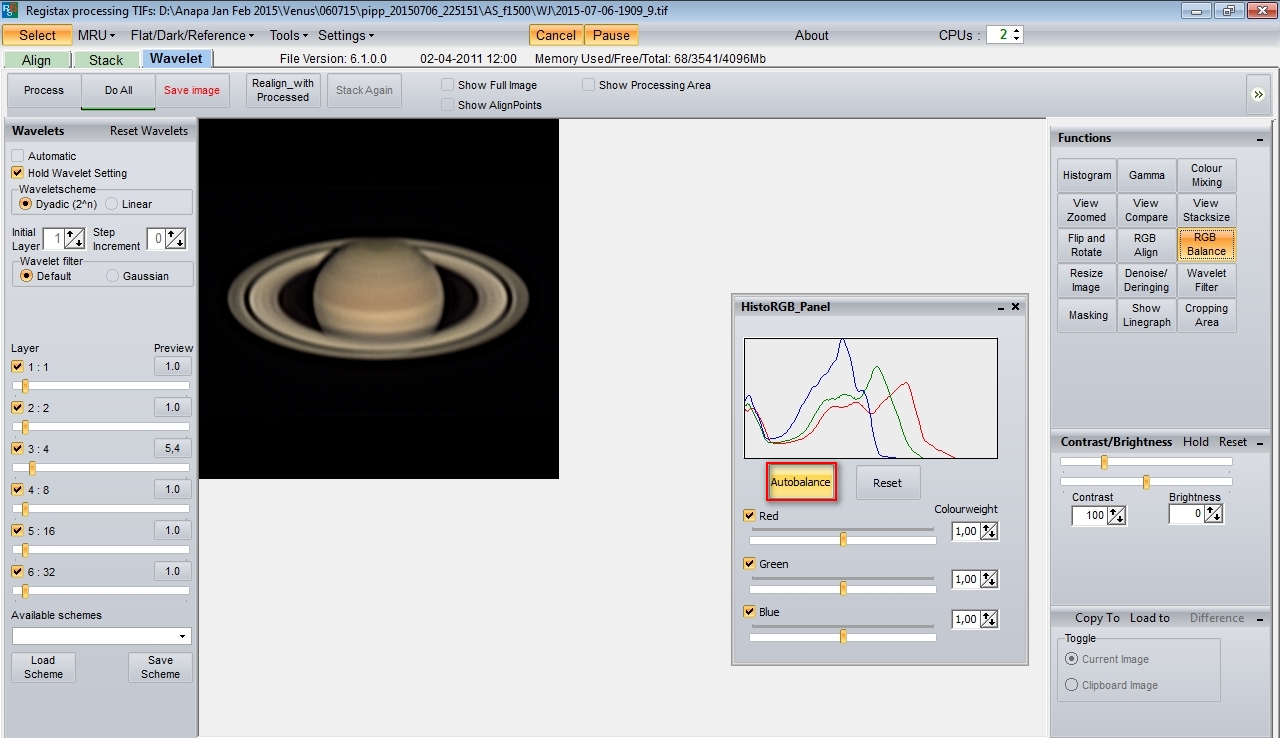
Next, we work with wavelets as usual – we move the second and third sliders, we raise the optimal detail, but also try not to overdo the processing. Trying, experimenting:

I like this color balance very much – this is what Saturn looks like when viewed through a telescope. However, according to common practice, this color balance is not very welcome and therefore we will resort to autobalance:

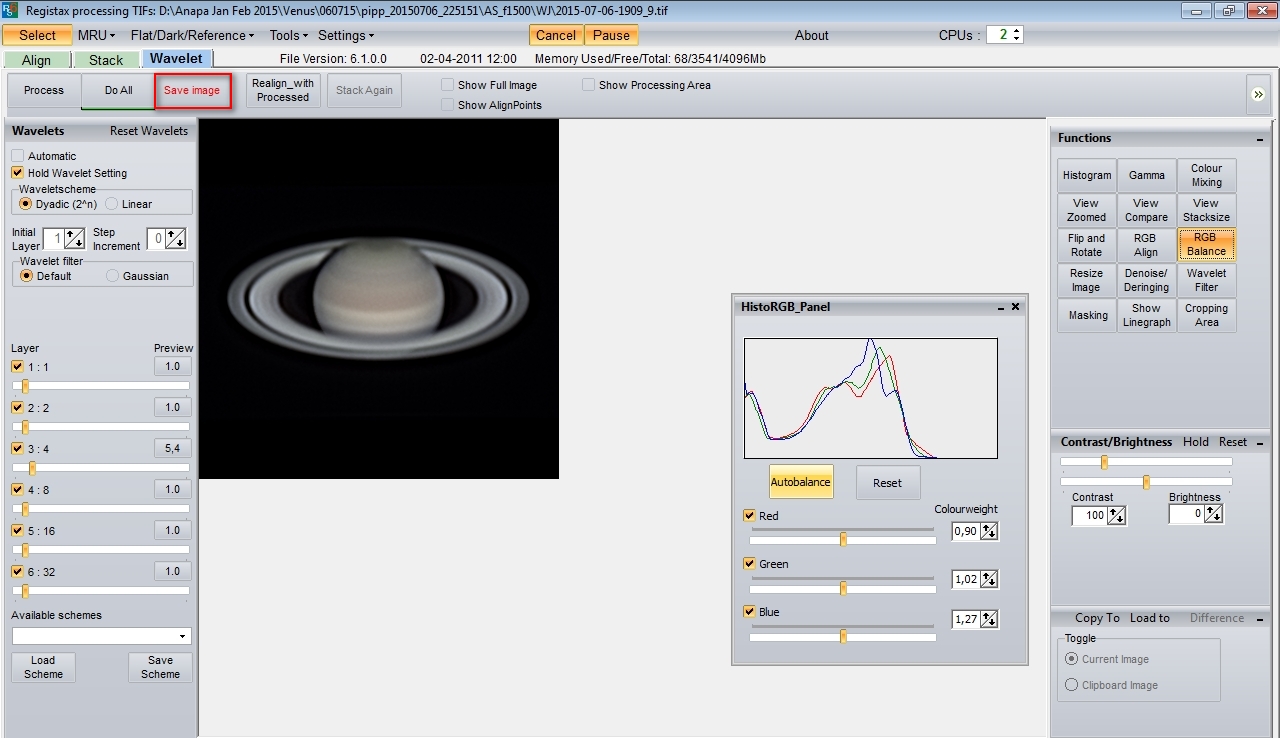
We get this coloring and save the result (button SAVE IMAGE):
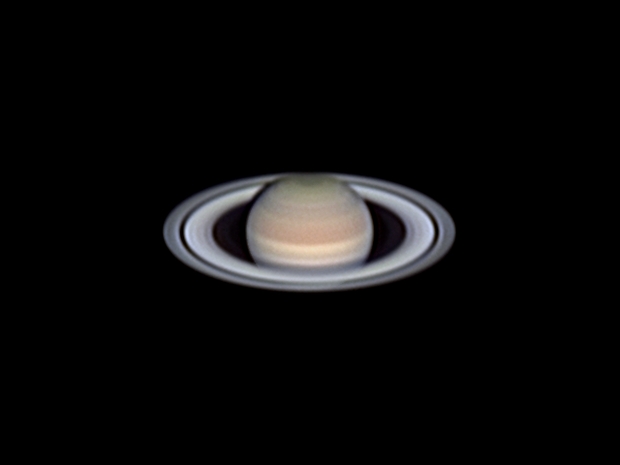
You can save several variants of wavelet processing – for example, on one result the cloudy belts of the planet are better visible, on the other – the rings are better worked. Their further combination is already carried out in graphic editors. If necessary, adjust the levels, add the saturation and we get as a result:
Good luck!
Добрый день. А какое время можно складывать в винюпосе по Юпитеру. Ведь он не просто вращается, но и пояса двигаются относительно другдруга и всячески меняются. Если сложить несколько стэков охватывающих например один час, не смажится картинка от того что вид планеты изменился? Спасибо.
Вообще рекомендуется около 15 минут, н я и около часа складывал, норм. За такой короткий период сдвиг поясов незаметен.
Спасибо за отличную статью! Все наглядно и понятно!
Пожалуйста.
А скажи, вот в шапке у Сатурна что-то типа пропасти. Ето артефакт съёмки или что-то типа гравитационного линзирования?
Если Вы по деформацию кольца, то это артефакт обработки.
Нет слов! Руслан, ты просто супер астрофотограф!
Спасибо! Я ещё только учусь 🙂
6 июля 2015 года, 22:09, Celestron Nexstar 8 SE, ЛБ SW 2x с Т-адаптером, турель Baader Q-Turret, ZWO 120 MC, PIPP, AS2 (1500\4994), R6+AI, 8 роликов в WJ.
Так вот же=) Тут и Autostakkert и WJ в описании
Я запутался 🙂
Итак, при обработке снимка использовались PIPP, Autostakkert, Registax (методика описана в статье https://www.star-hunter.ru/planetary-imaging/), а также WinJUPOS (методика описана в данной статье).
Записываем ролики, обрезаем их в PIPP, закидываем в Autostakkert, складываем, к полученным стэкам применяем вейвлеты (Registax или Astra Image), и затем уже обработанные стэки закидываем в WinJUPOS. После WinJUPOS открываем полученный ОДИН стэк в Registax или Astra Image и добавляем чуть вейвлетов или деконволюции.
аааа=) Все теперь понял) То есть обработка после регистакса ещё и WJ=) Теперь дошло) Я думал что WJ сразу хавает ролики) Кстати деконволюция что это за зверь, для чего и чем её делать?))
Спасибо за разъяснения!
В описании итогового изображения указан AutoStakkert, хотя в гайде его нет. Вот я как раз недавно тренировался с вашими предыдущими стеками и не получалось у меня получить то же изображение после обработки видео. Я так понимаю там тоже использовался WJ, а в каком месте тут применяется AutoStakkert я так и не понял 🙂
Я в самом начале дал ссылку на статью о съемке планет
https://www.star-hunter.ru/planetary-imaging/
Там и применяется Autostakkert – отбор и сложение кадров. WinJUPOS не использовался.